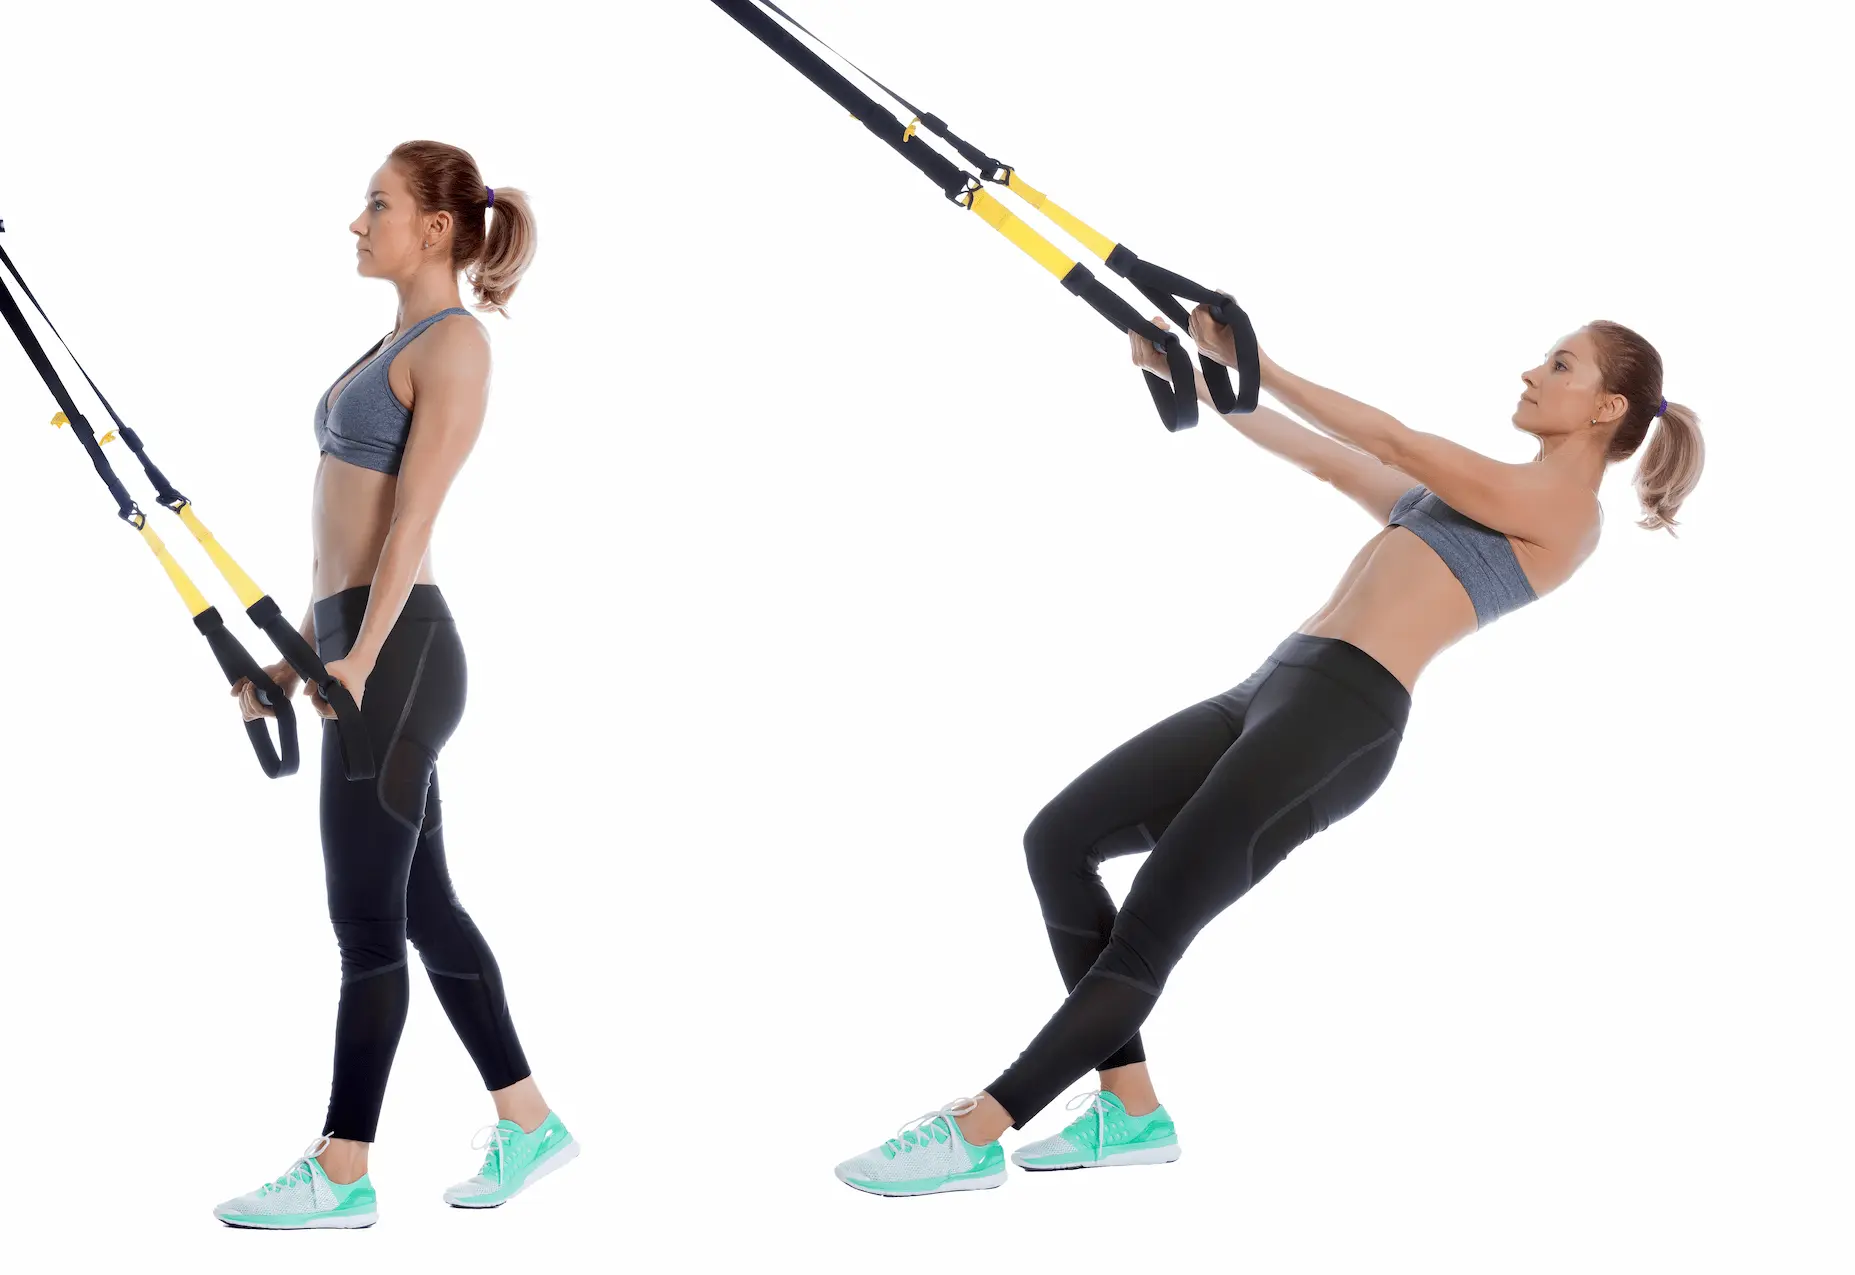
Straight-Arm Suspension Strap Row – Straight Arm TRX® Row
Category : 🟥 Pulling – Lats / Scapula
Difficulty : ★★☆☆☆ (intermediate)
Equipment : Suspension straps (TRX®-type)
Straight arms, shoulders down, solid bracing: the Straight Arm TRX Row is a foundation for building a strong pulling back.
Purpose
- Strengthen the latissimus dorsi and scapular muscles in depression, with the arms kept straight.
- Develop technical strength in scapular pulling, without letting the elbows take over.
- Train anti-extension bracing and whole-body stability in suspension training.
- Use it as a technical drill before pull-ups and vertical pulling work, such as the lat pulldown.
Muscles involved
- Primary muscles: Latissimus dorsi, teres major, lower trapezius fibers.
- Synergists / stabilizers: Triceps for stabilization, rear deltoids, spinal erectors, transverse abdominis, glutes, global core bracing.
Variations
- Regressions: more vertical body angle, partial range of motion, rear foot set back for extra stability.
- Variations: unilateral version for anti-rotation, tempo 3–1–3, 2-second isometric hold at the end of the pull, feet elevated to increase effective load.
- Tempo: a 3–4 s eccentric can be used to increase training density without increasing the body angle.
• Strap length: handles at forehead height.
• Anchor point: around 2 m high, such as a door, beam, or standard ceiling; higher if possible, such as a high beam or rig. During the pull, the straps should rise at roughly 30° relative to a horizontal line parallel to the floor, and the body angle is adjusted through foot position.
• Handle symmetry: handles at the same height, straps untwisted, and equal tension on both sides before loading the movement.
• Foot placement: feet hip-width apart, body held in an inclined plank; the farther the feet move forward under the anchor, the harder the exercise becomes.
This block is the core of the Suspension Training warm-up (2 minutes)
It must be performed before phases 2 (Neuro) and 3 (HIIT).
Straps at mid-calf height, long plank position, shoulders slightly in front of the wrists, transverse abdominis engaged. Micro Body Saw version = small forward/backward oscillation without losing body alignment.
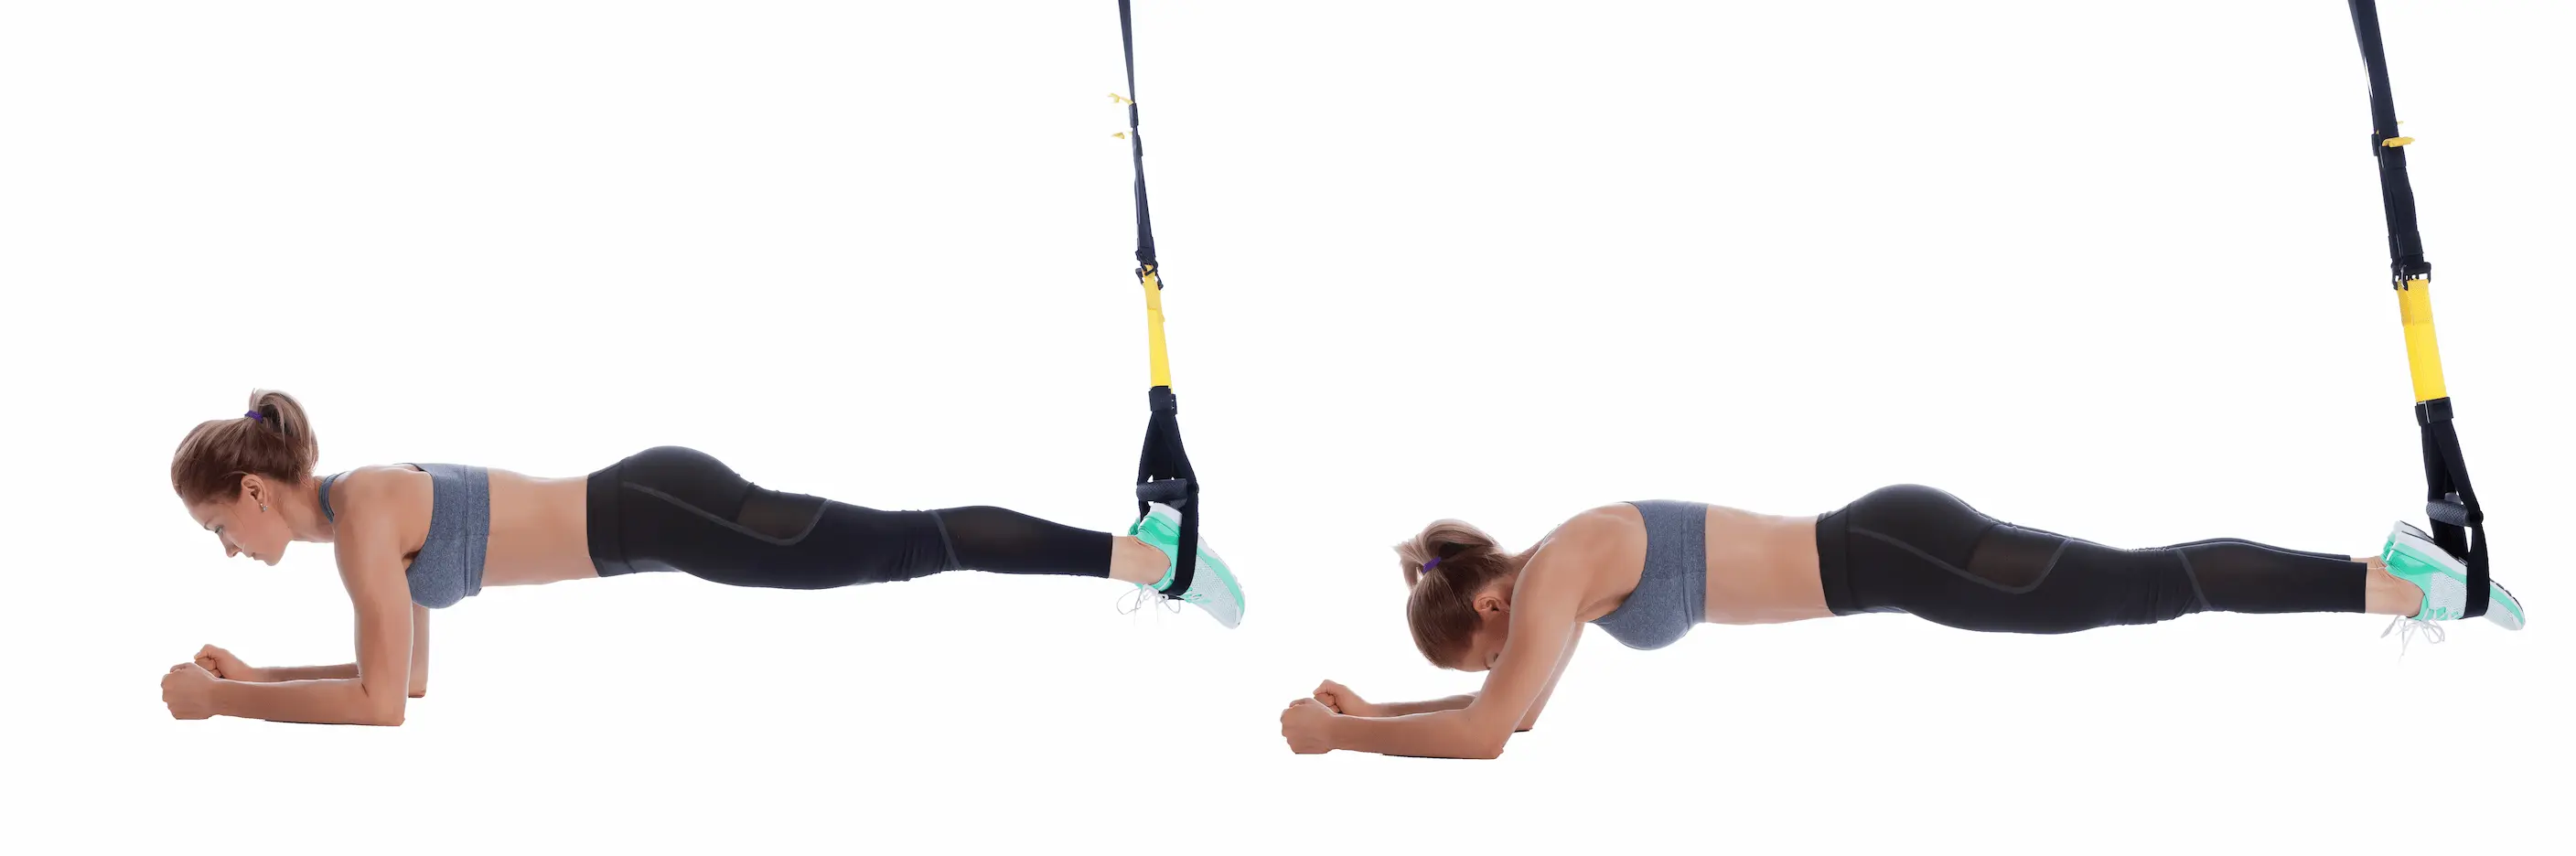
Arms straight, with a small forward shift of the center of gravity. Focus on anti-extension control, without chasing maximum range of motion.
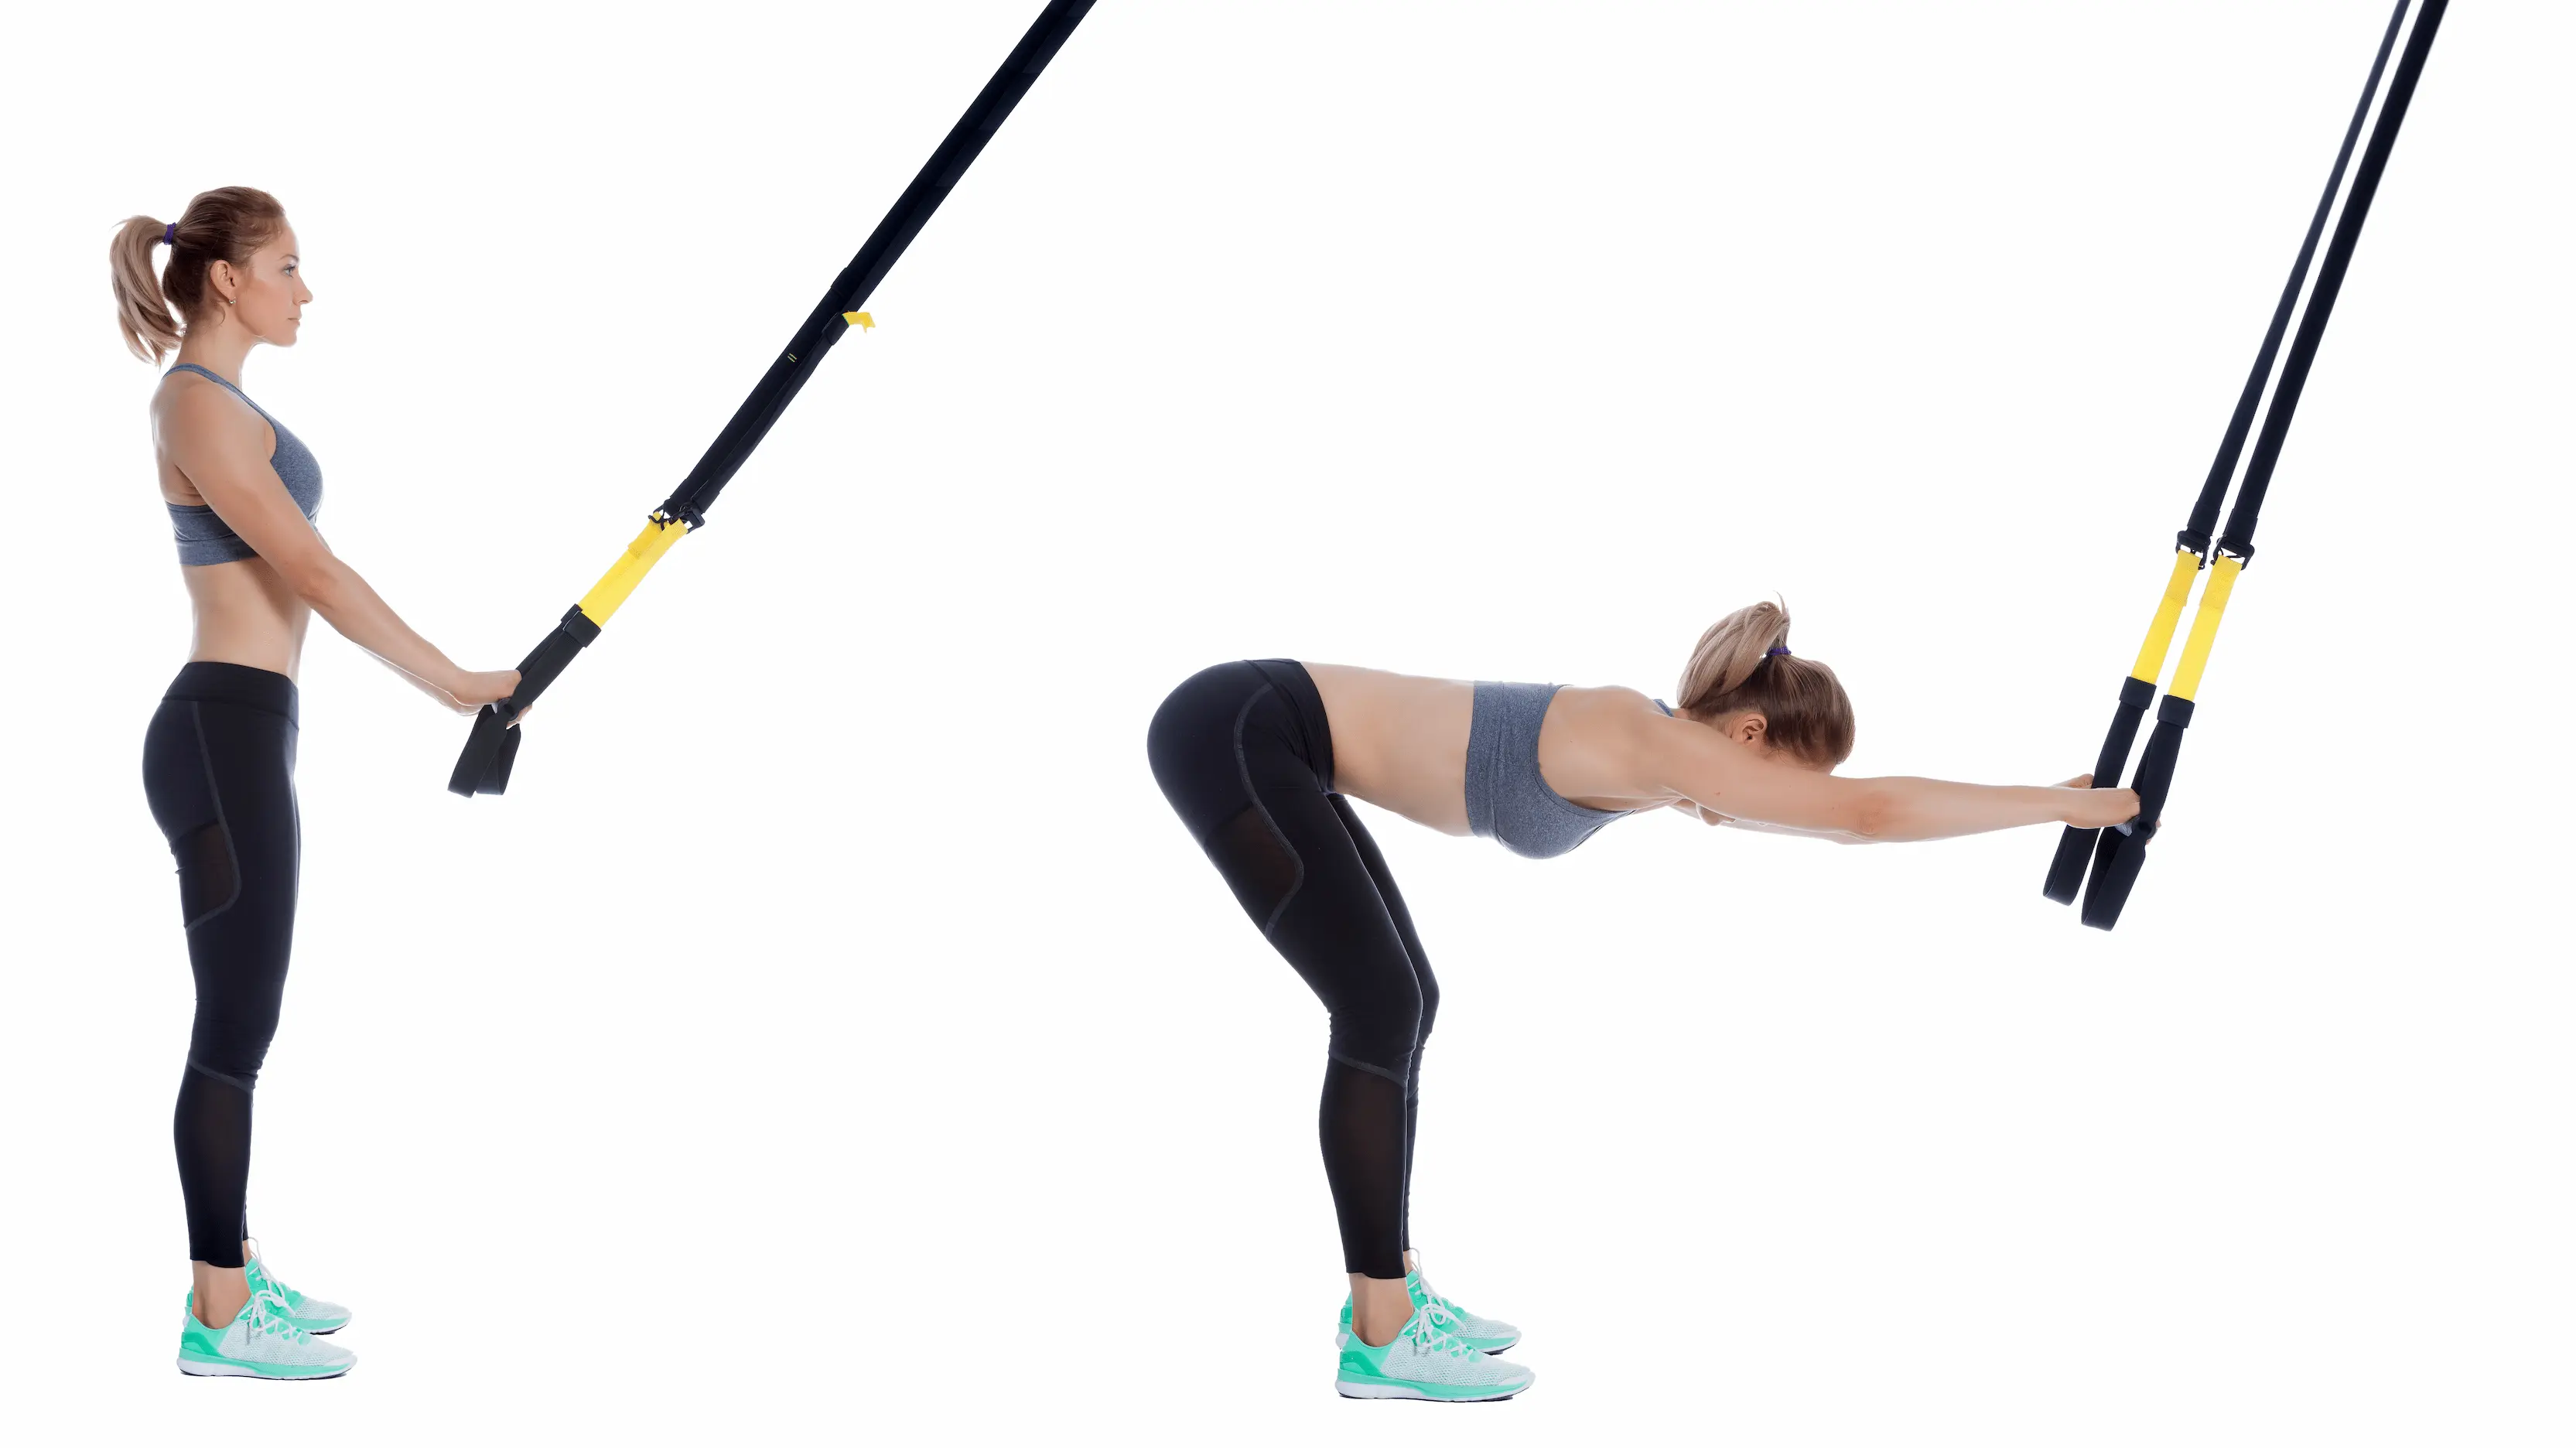
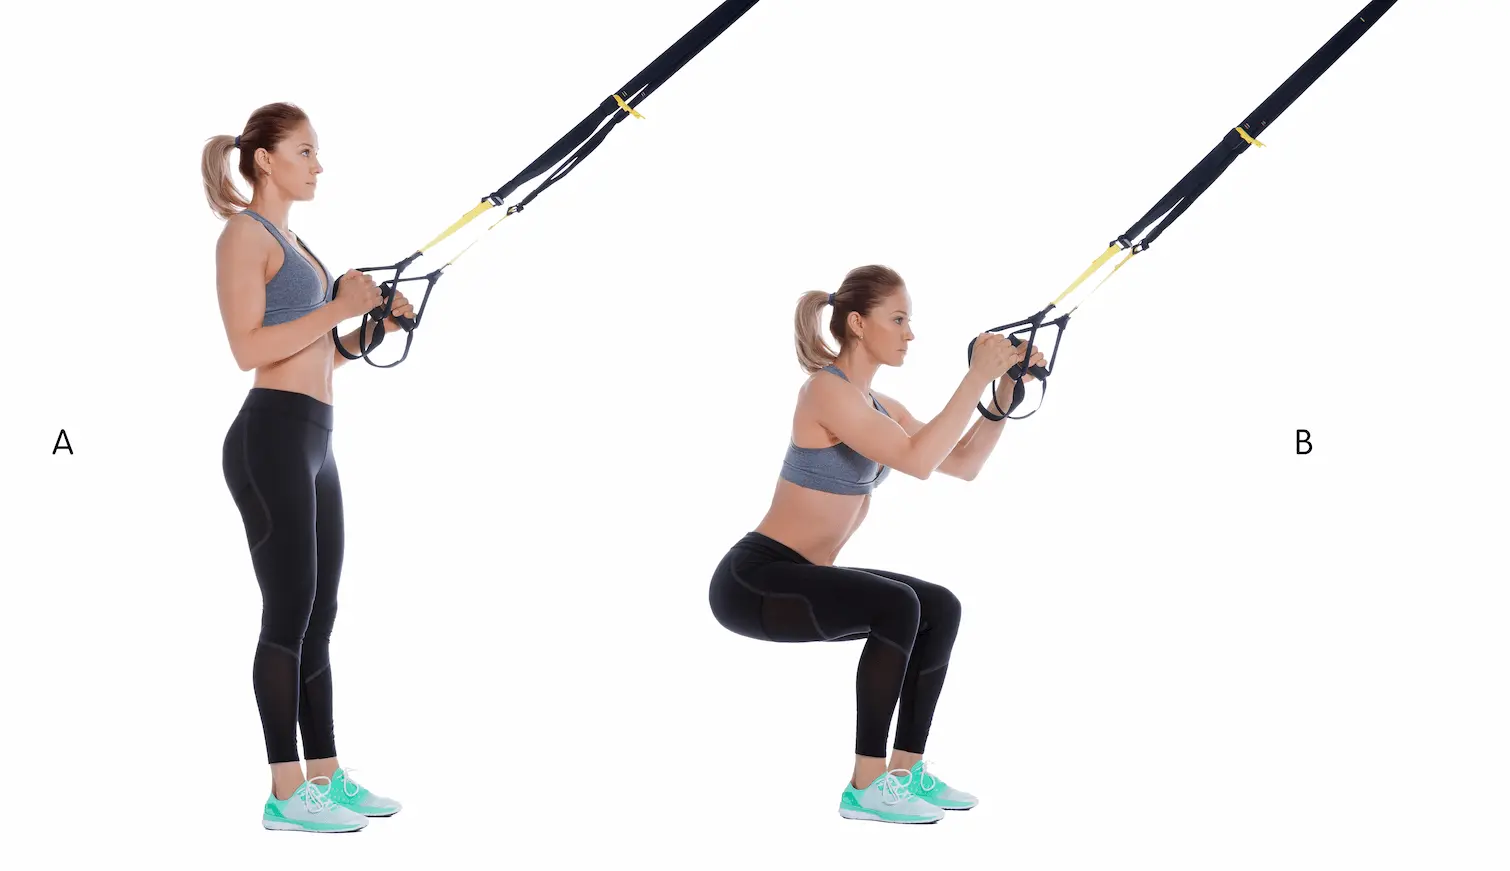
Assisted squat using the straps, with a moderate range of motion. Helps activate the hips, knees, and global coordination without creating excessive muscular fatigue.
Arms straight, with a very small forward shift of 5–10 cm. Prepares deep anti-extension work and trunk control for more demanding variations.
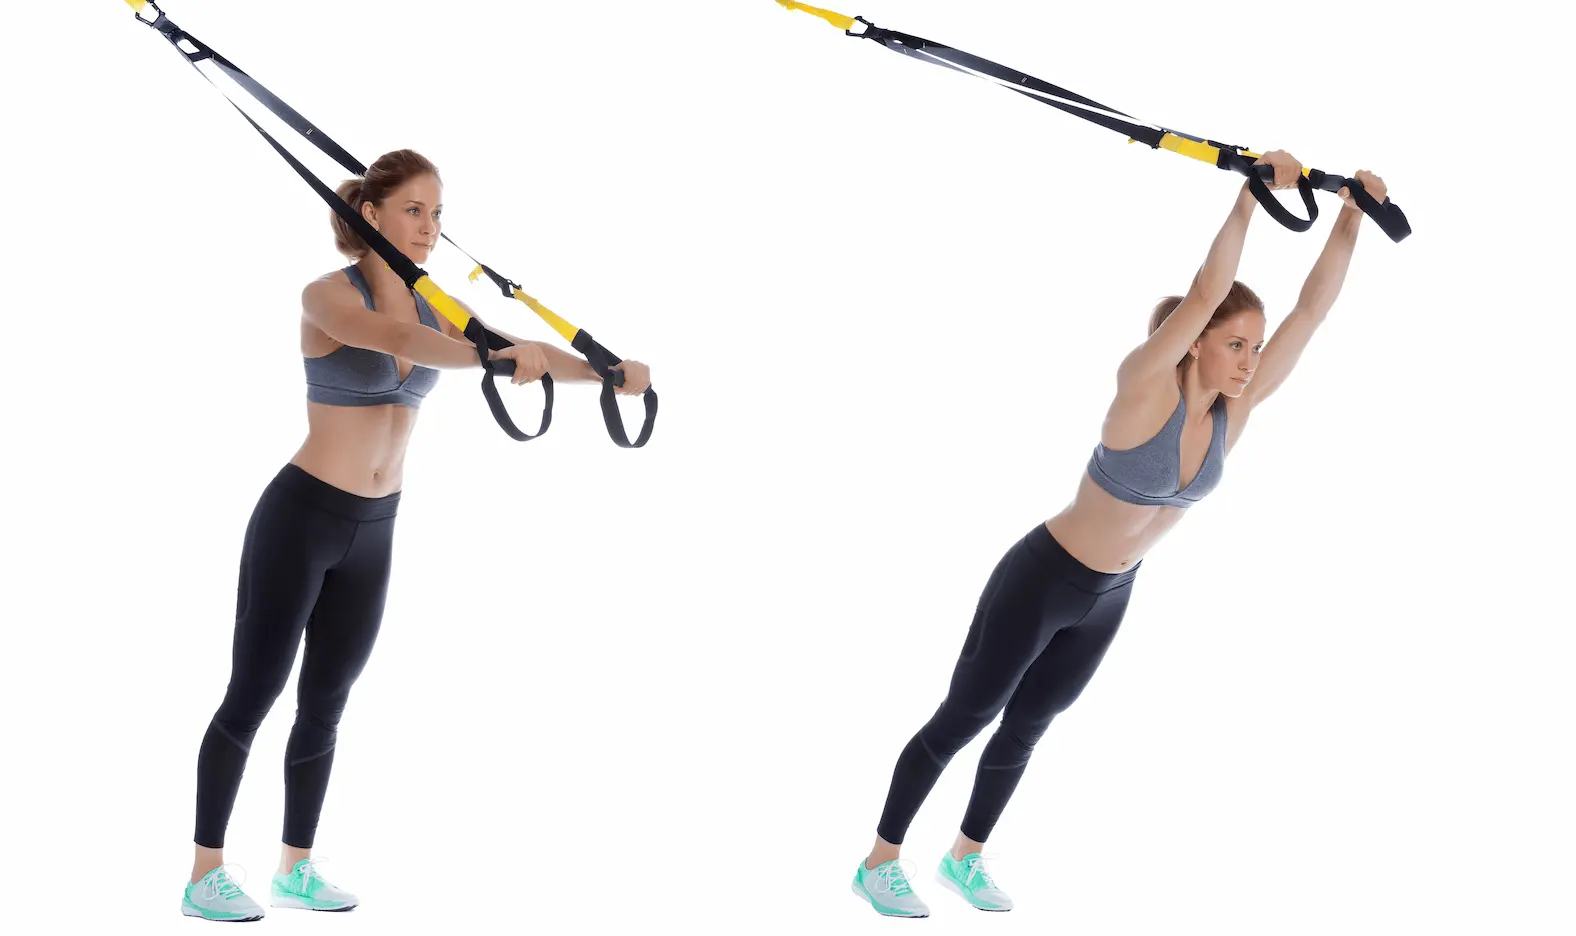
- Starting position:
Stand with the feet forward, arms extended in front of you, using a neutral grip on the handles. Shoulders down, chest open, but ribs pulled down. Glutes squeezed, trunk locked as one unit, body aligned from ankles to ears. - Concentric phase (scapular pull):
As you exhale, pull the torso toward the straps by initiating the movement from the shoulder blades, combining depression and retraction. The elbows stay almost straight: you pull with the back, not with the arms. - Eccentric phase (controlled return):
Let the body move back over 2–3 seconds while keeping the arms straight and the shoulders controlled. No sudden drop or release; the shoulder-to-pelvis line stays fixed. - Target rhythm / range of motion:
Reference tempo 2–1–2 (2 s return – 1 s control – 2 s pull). Use a range of motion that allows you to keep the scapula controlled without elevating the shoulder or bending the elbows.
| ❌ Common faults | ✅ Best practices |
|---|---|
|
|
| Phase 3 – HIIT (Cardio Peak 1) Interval training – Straight Arm TRX® Row | Phase 4 – Muscle Workout (upper body) Antagonist pull / push superset | |
|---|---|---|
| Purpose |
Reach a high cardiovascular intensity using the Straight Arm Suspension Strap Row (TRX®-type), through interval training: sustained work periods, very short rests, and, if needed, the addition of a more cardio-driven exercise in superset format, such as jumping jacks or mountain climbers, while following the timer. | Integrate the Straight Arm Row into an upper-body Muscle Workout block to strengthen the latissimus dorsi, scapular stabilizers, and core bracing, systematically pairing it with an antagonist pushing exercise, such as push-ups or a suspension strap chest press, in a superset to balance the shoulder and optimize session time. |
| Structure |
Typical HIIT format: – 8 to 10 rounds of 30" work / 15" recovery or 6 to 8 rounds of 40" work / 20" recovery. Option 1: Straight Arm Row only, chaining the intervals while maintaining a dynamic rhythm. Option 2: cardio superset: A1 – Straight Arm Row (suspension straps) A2 – Cardio exercise (jumping jacks, mountain climbers, etc.) Follow the timer; transitions must stay under 10 s. |
3–4 supersets: A1 – Straight Arm Suspension Strap Row A2 – Pushing exercise (push-ups, TRX® chest press, press variation, etc.) 8–12 controlled reps per exercise, using a 2–1–2 or 3–1–2 tempo to maintain tension. Priority: centered shoulder, active scapula, stable ribcage alignment. |
| Load |
Bodyweight only. Choose a moderate body angle that allows you to: – keep clean technique for the full interval, – maintain a smooth cadence with no dead time. If your cardiovascular output drops, reduce the body angle between rounds rather than cutting the interval short. |
Bodyweight with a more demanding angle, aiming to approach technical failure between the 8th and 12th rep. Possible progression: – increase body inclination, – slow the eccentric to 3–4 s, – potentially add a weighted vest for advanced trainees. |
| Rest |
Between intervals: 10–20 s max recovery, just enough to catch your breath without
letting heart rate fully drop. Between HIIT blocks, if you perform two: 60–90 s of active recovery, such as walking or light mobility. |
Between A1 and A2: no rest; move directly from the pull to the push. Between each full superset (A1 + A2): 60–90 s recovery. If technique breaks down, extend the rest slightly rather than rushing through the final reps. |
| Frequency |
1–2×/week depending on your tolerance to intense cardio work and your overall training load. Place this block early or mid-session, not after a very heavy back workout. Avoid performing two similar HIIT sessions on back-to-back days. |
1–3×/week depending on your split: full-body, upper/lower, or push/pull. Keep at least 48 hours of recovery between two heavily loaded back/push sessions, especially if you keep the antagonist superset every time. |
| Key cue |
The goal is to be breathless but clean: if the body angle or cardio demand makes you
lose bracing or shrug the shoulders, simplify. Scapulae glide, arms stay almost straight, and there is no jerking through the strap. Stop or reduce the difficulty if you lose core control or if shoulder pain appears. |
Think “pull + push = balanced shoulder.” If you perform a lot of pressing and not enough pulling,
this superset becomes a priority in your weekly plan. Keep the arms almost straight, shoulders down, and look for the lat / scapular sensation before the biceps. If the front of the shoulder becomes overloaded, reduce the angle and rebuild scapular control. |
| Strength & control (anti-extension, TUT 20–35 s) | Hypertrophy / density (continuous tension, TUT 30–45 s) | Muscular endurance (lat endurance + core bracing, TUT 35–50 s) | |
|---|---|---|---|
| Sets | 3 | 4 | 3 |
| Reps | 6 – 8 | 10 – 12 | 15 – 20 |
| Tempo | 2 – 1 – 2 (3 – 1 – 2 possible) | 2 – 1 – 2 | 2 – 0 – 2 |
| Rest | 90 s | 60 s | 45 s |
Phase 3 – HIIT (Cardio Peak 1)
Phase 4 – Muscle Workout
Integration logic
- Use the Straight Arm Row as a scapular control drill after the general warm-up: learning “shoulders down, arms straight, pull through the back.”
- In Phase 4, integrate it into a push ↔ pull superset with a pushing movement, such as TRX flyes, TRX push-ups, or bench press.
- Ensure agonist / antagonist balance across the session: as much pushing as pulling, with both anterior and posterior core work.
Recommended frequency
- Phase 3: 2–3 technical sets in superset with a cardio exercise, 1–2 times per week, before the main pulling block.
- Phase 4: 3–4 sets of 8–12 reps, or one 100-Rep Set for advanced trainees, within a back / pulling session or a full-body session.
- Avoid placing it the day after a very heavy back session or immediately before heavy weighted pull-up work.
The Straight Arm TRX Row is a lat-connection exercise. If you rush too quickly toward intensity, you will bend the elbows, shrug the shoulders, and “pull with the arms.” Phase 2 – Neuro-Activation is used to program the correct pattern:
- Isolated scapular depression
With the arms straight, you learn to lower the shoulders without bending the elbows. Small range of motion, focus on the latissimus dorsi. - Straight-arm micro pull
20–30% range of motion, slow movement. You lock the elbows in position and let the scapula guide the torso. Goal: feel the back, not the biceps. - Standard range of motion
Move into 8–10 reps with full range of motion, still keeping the arms almost straight. Stay within a range where the scapula remains stable and depressed. - Technical pre-fatigue
Two mini-sets of 6–8 perfect reps are enough to “anchor” the pattern. Only then do you move into the strength / density block. - Internal cues
In the Neuro Phase, you are not chasing the pump: you are looking for the right signals: lats switching on, shoulders staying down, solid bracing, and no pinching at the front of the shoulder.
The Neuro Phase is not a decorative option: it is what turns a simple “arm pull” into targeted lat + scapular work. Intensity comes afterward.
If the biceps burn more than the back, your angle is too demanding or you are bending the elbows — simplify the angle and refocus on the shoulder blades.
TRX® is a registered trademark of Fitness Anywhere LLC.