
TRX® Standing Rollout – Standing rollout with suspension straps
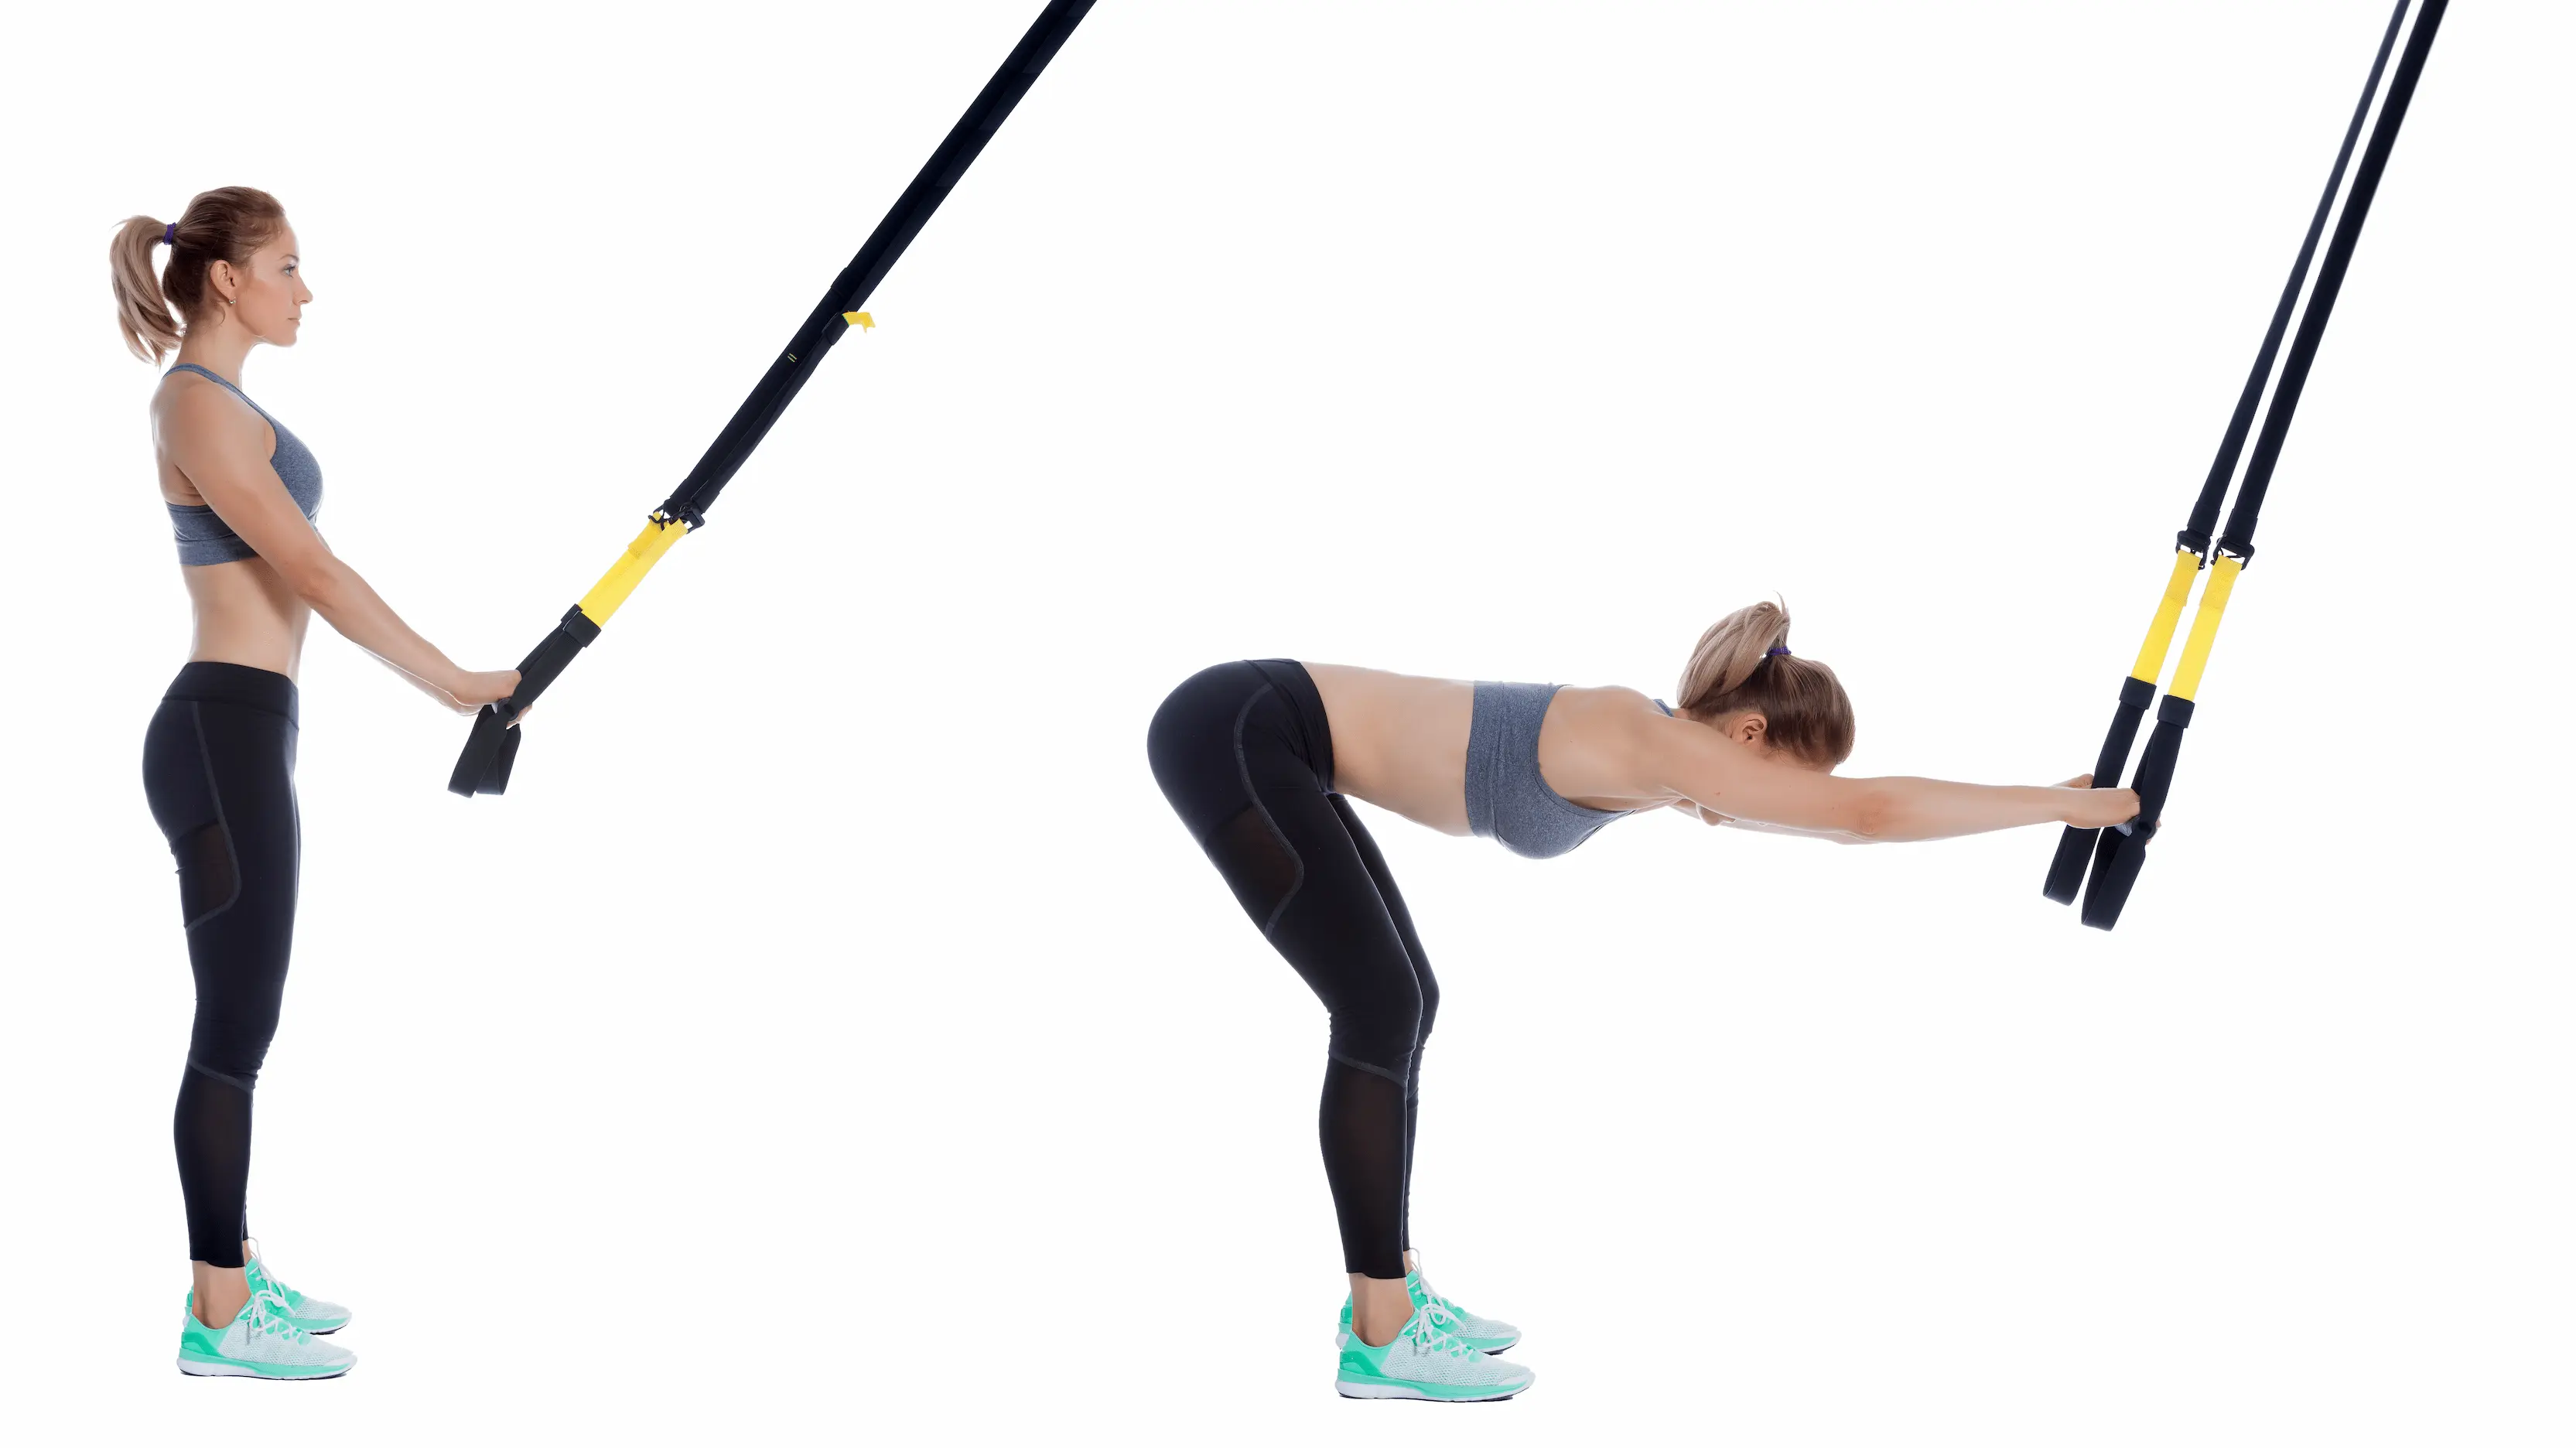
Category : 🟩 Core (anti-extension)
Difficulty : ★★☆☆☆ → ★★★★☆ (depending on body angle)
Equipment : Suspension straps (TRX®-type)
In a good TRX® Standing Rollout, bracing determines the range of motion — not ego.
Purpose
- Strengthen trunk anti-extension strength in an inclined body position.
- Improve scapular stability and straight-arm control in suspension training.
- Build a solid shoulder–trunk connection for all overhead movements and density-based formats.
Muscles involved
- Primary muscles: deep abdominals (transversus abdominis, obliques), latissimus dorsi, serratus anterior, anterior deltoid.
- Synergists / stabilisers: triceps (straight-arm position), glutes (anti-extension), spinal erectors (isometric control), upper fibres of the pectorals.
Variations
- Beginner regressions: shallow angle (feet far from the anchor point), partial range of motion (arms up to ~45°), or 3×10 s isometric holds.
- Density variation: 4–2–2 tempo to increase time under tension without overloading the shoulders.
- Advanced variation: unilateral version (one arm) for extreme anti-rotation work and even more demanding bracing.
- Strap length: mid-thigh. The longer the straps, the more unstable and demanding the movement becomes for the core.
- Anchor point: around 2 m or higher (door, beam, standard ceiling), higher if possible (high beam, rig). Under tension, the straps should be almost vertical, with difficulty adjusted through foot position.
- Handle symmetry: handles at the same height, straps parallel, and equal tension before leaning forward.
- Foot placement: feet hip-width apart on a stable surface. Step the feet forward to reduce resistance; step them back to increase the incline and the anti-extension demand.
This block is the core of the Suspension Training Warmup (2 minutes)
This must be performed before phases 2 (Neuro) and 3 (HIIT).
Straps at mid-calf, long plank position, shoulders slightly in front of the wrists, transversus abdominis active. Micro-Body Saw version = small forward/backward oscillation without losing body alignment.
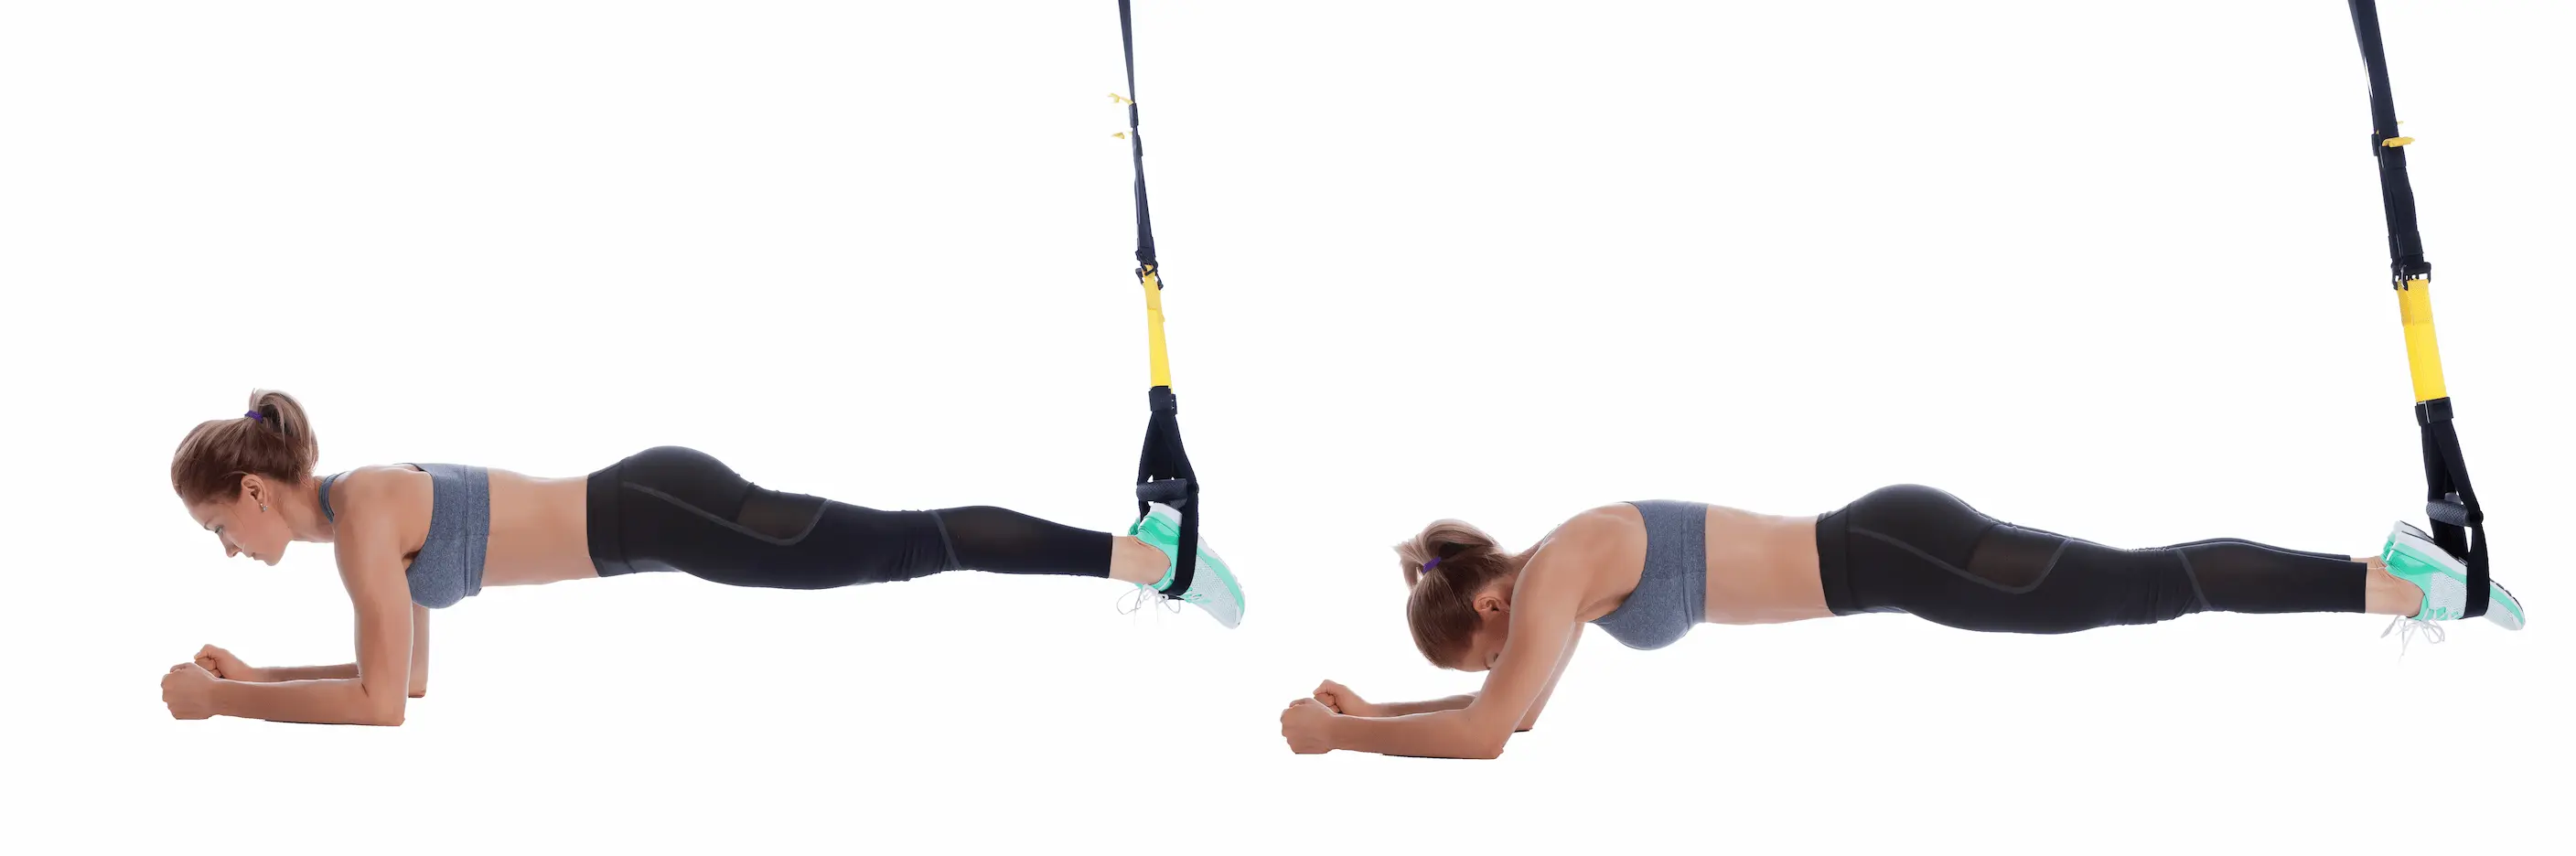
Reduced range of motion, elbows almost straight. Purpose: learn to “pull the shoulders toward the hips” (shoulder packing) to secure future TRX Pike / Push work.
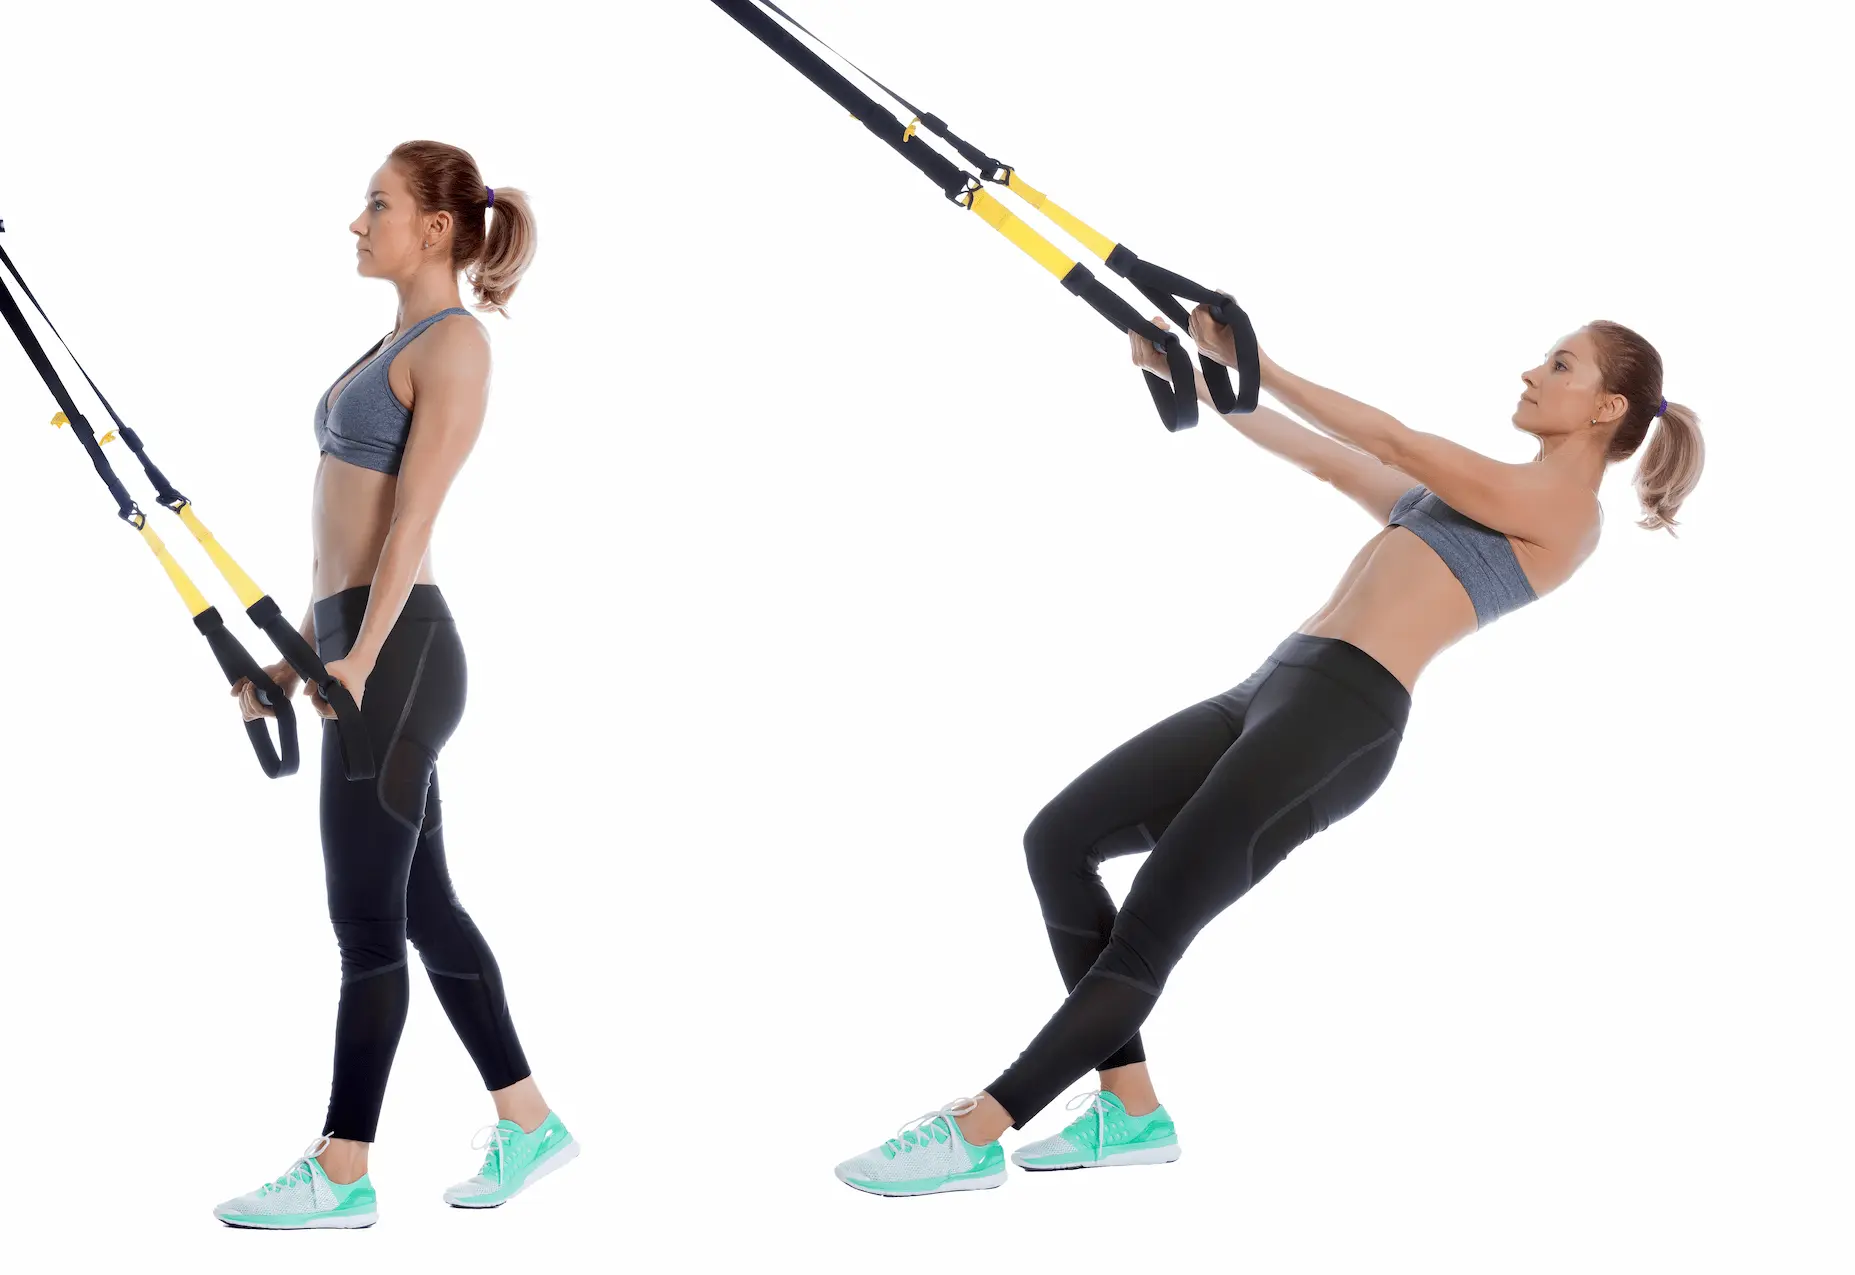
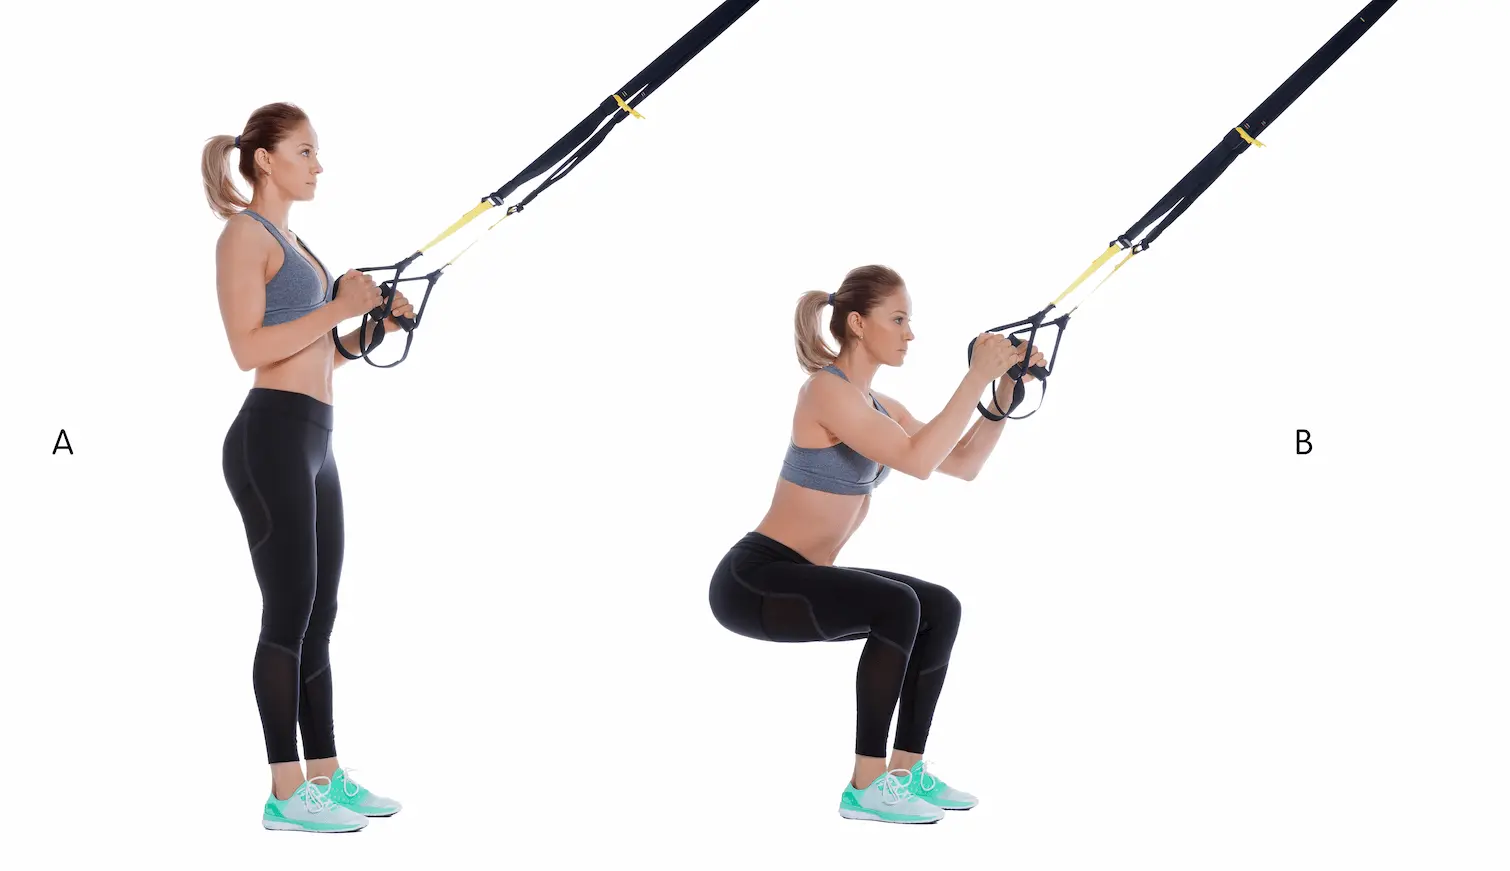
Assisted squat using the straps, moderate range of motion. Helps activate the hips, knees, and global coordination without excessive muscular fatigue.
Arms straight, small forward shift (5–10 cm). Prepares deep anti-extension work and trunk control for more demanding variations.
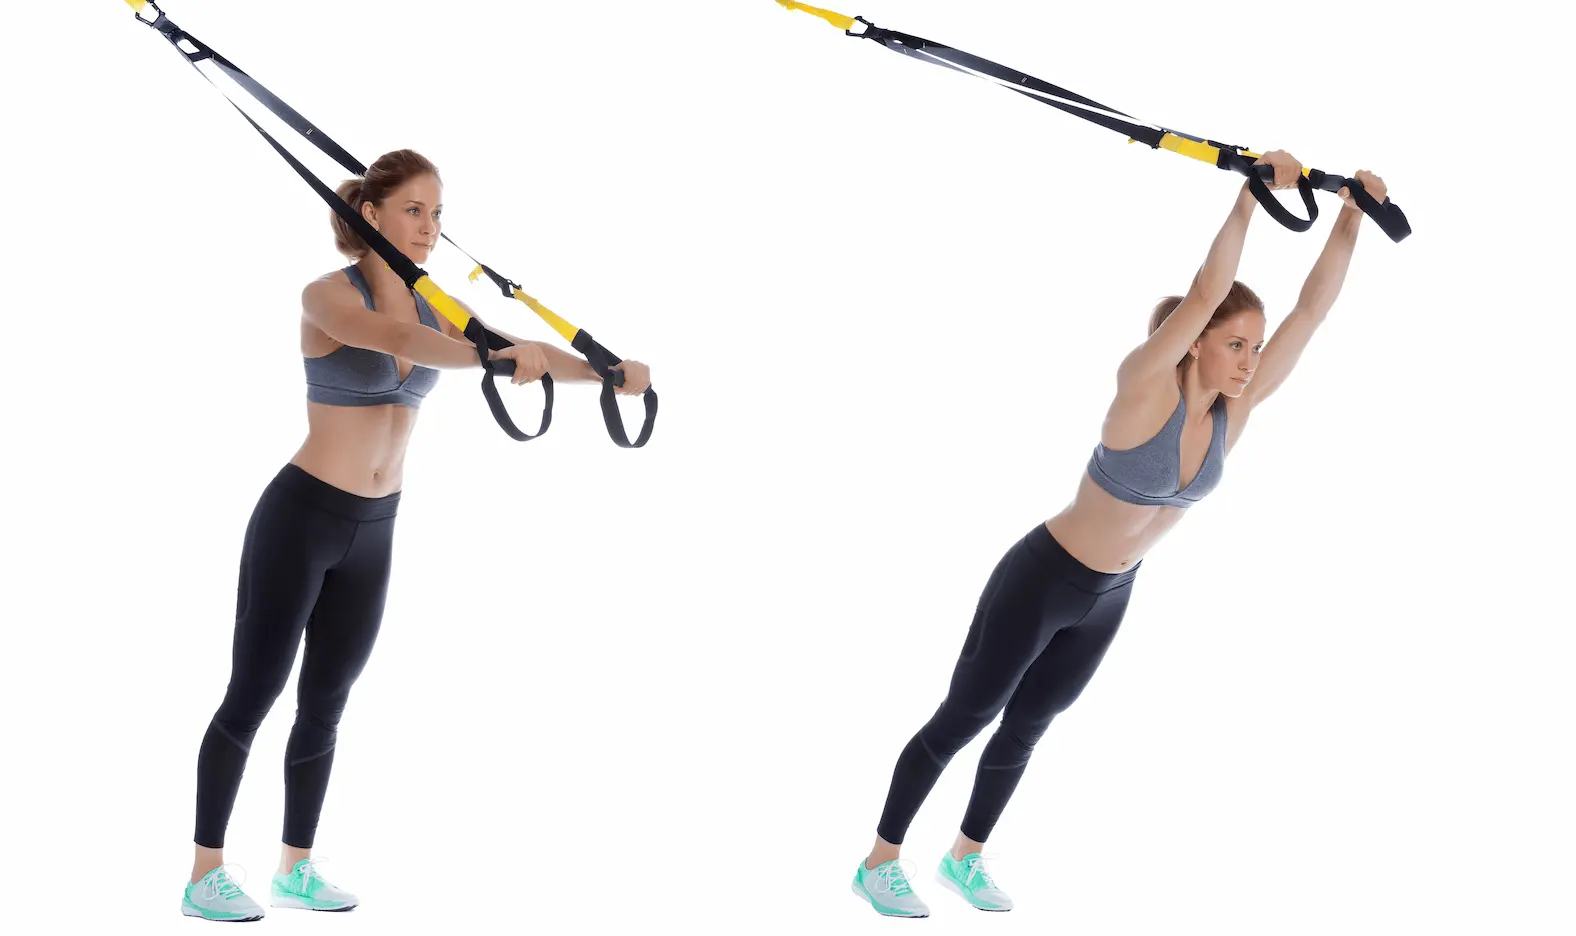
- Starting position:
Stand facing the anchor point, holding the suspension straps (TRX®-type) in your hands, arms straight or very slightly bent in front of you. Body aligned (ears–shoulders–hips–ankles), feet hip-width apart, glutes lightly engaged, abs braced, shoulders down. - Movement phase – forward lean:
Step the feet slightly back, then let the body lean forward as one solid unit, with the arms moving overhead. The elbows stay almost straight: the trunk controls extension, not the biceps. Inhale while controlling the descent, without arching the lower back. - Return phase:
From the lowest position you can hold cleanly, exhale and bring the body back toward vertical by “pulling” the pelvis underneath the shoulders through bracing and glute engagement. The arms stay straight, the shoulder blades glide toward the back pockets (active serratus), and the rib cage stays locked down. - Rhythm and range of motion:
Choose a range of motion that allows you to maintain a clean head–pelvis line, without lumbar arching. Base tempo: 2–1–2 (2 s descent / 1 s control / 2 s return). Density variation: 4–2–2 on advanced sets.
| ❌ Common faults | ✅ Best practices |
|---|---|
|
|
| Density format Phase 4 – Muscle Workout | Endurance format Phase 4 – Muscle Workout | |
|---|---|---|
| Purpose | Increase anti-extension and serratus density work through a controlled tempo. | Build local core endurance over longer sets without breaking alignment. |
| Structure | 4×10–12 controlled repetitions, 2–1–2 tempo, then 4–2–2 on the final block. | 3×15–20 repetitions with a slightly reduced range of motion to keep technique clean. |
| Load / intensity | RPE 7–8: significant body incline, but no lumbar arching. | RPE 6–7: progressive muscular burn, with postural control as the priority. |
| Intra-set rest | 60–75 s rest between sets. | 45–60 s active rest (walking, shaking out the arms). |
| Frequency | 1–2×/week in Block 4 for overhead profiles or athletes with sensitive shoulders. | 1×/week as a complement to another bracing/core drill. |
| Key cue | Stop progressing as soon as technique breaks down: no ego-lifting on the rollout. | Reduce the range of motion before reducing repetitions: the head–pelvis line remains non-negotiable. |
| Technical strength Control / alignment | Muscular density Continuous tension | Muscular endurance Local endurance | |
|---|---|---|---|
| Sets | 3 | 4 | 3 |
| Repetitions | 6–8 | 10–12 | 15–20 |
| Tempo | 3–1–2 | 2–1–2 | 2–0–2 |
| Advanced variation (tempo) | — | 4–2–2 (last set) | — |
| Rest | 90 s | 60 s | 45 s |
| Coach’s note | Intensity depends entirely on body angle: the more you lean, the more you engage the serratus and the anti-extension system. Adjust foot distance instead of sacrificing alignment. | ||
Phase 4 – Muscle Workout
Integration logic
- Use the TRX® Standing Rollout as a straight-arm, core-focused pushing exercise.
- Pair it in a superset with a straight-arm pulling exercise (e.g. TRX Straight-Arm Row) to balance the anterior/posterior chain and serratus work.
- Place it at the start of Block 4 to “wake up” the core before overhead pressing, or at the end of the session as a specific shoulder–trunk density block.
Recommended frequency
- 1×/week is enough for most trainees; increase to 2×/week for overhead profiles (cross-training, throwing sports, swimming) or sensitive shoulders.
- Work in 3–4 week cycles by progressively increasing the incline or volume, then deload for one week to let the shoulders and lower back recover.
In the TRX® Standing Rollout, every centimetre of range must be earned through bracing — never through lumbar arching.
TRX® is a registered trademark of Fitness Anywhere LLC.