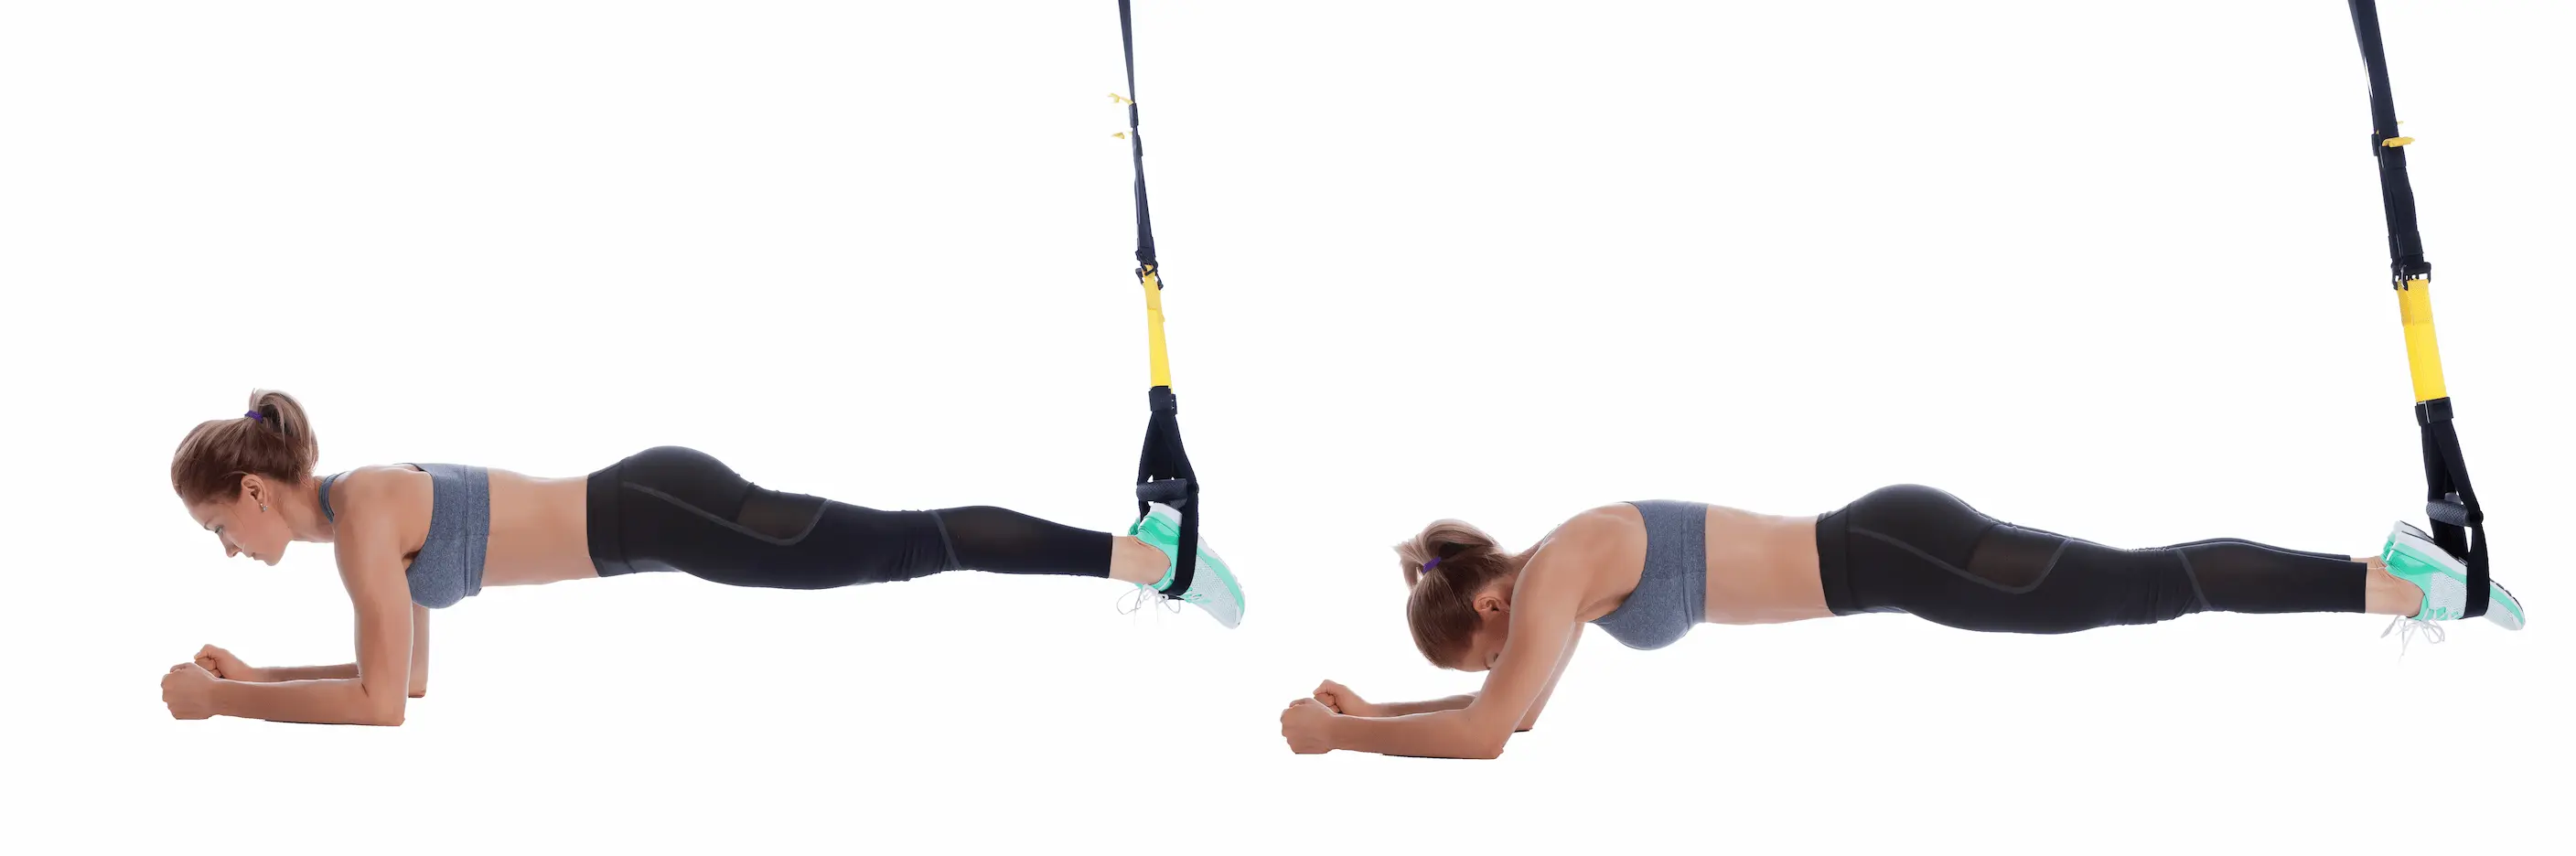
TRX® Body Saw – Dynamic plank with suspension straps
Category : 🟩 Core (dynamic bracing / anti-extension)
Difficulty : ★★★☆☆ (intermediate)
Equipment : TRX® suspension straps
A good TRX® Body Saw: small movement, major core control.
Purpose
- Build technical core strength in anti-extension and anti-collapse control.
- Increase continuous tension through the forward–backward movement that lengthens the lever arm.
- Learn to transfer force between the upper and lower body under controlled instability in suspension training.
Muscles involved
- Primary muscles: transverse abdominis, rectus abdominis, obliques.
- Synergists / stabilisers: shoulders, serratus anterior, glutes, deep lumbar stabilisers.
Variations
- Regression: static plank with feet in the straps, very short range of motion.
- Pause variation: body saw with a 2-second isometric hold in the forward position.
- Isometric variation: hold the forward position for 6–10 s to reinforce core bracing.
- Unilateral variation (advanced): remove one foot from the straps to create maximum instability.
- Strap length: short, with the feet ~20–30 cm off the floor to keep a safe movement margin.
- Anchor point: overhead and high. Around 2 m is suitable for a door, beam, or standard ceiling; higher if possible, such as a high beam or rig. The straps should be almost vertical in the plank position.
- Handle symmetry: same height, straps not twisted, and equal tension before placing the feet.
- Foot placement: toes inside the foot cradles, feet parallel, ankles aligned with the pelvis.
- Other key cues: the higher the straps are from the floor, the longer the lever arm becomes and the more demanding the exercise is.
This block is the core of the Suspension Training Warm-up (2 minutes)
Mandatory before phases 2 (Neuro) and 3 (HIIT).
Arms extended, with a small forward shift of the centre of gravity. Focus on anti-extension control without chasing maximum range.
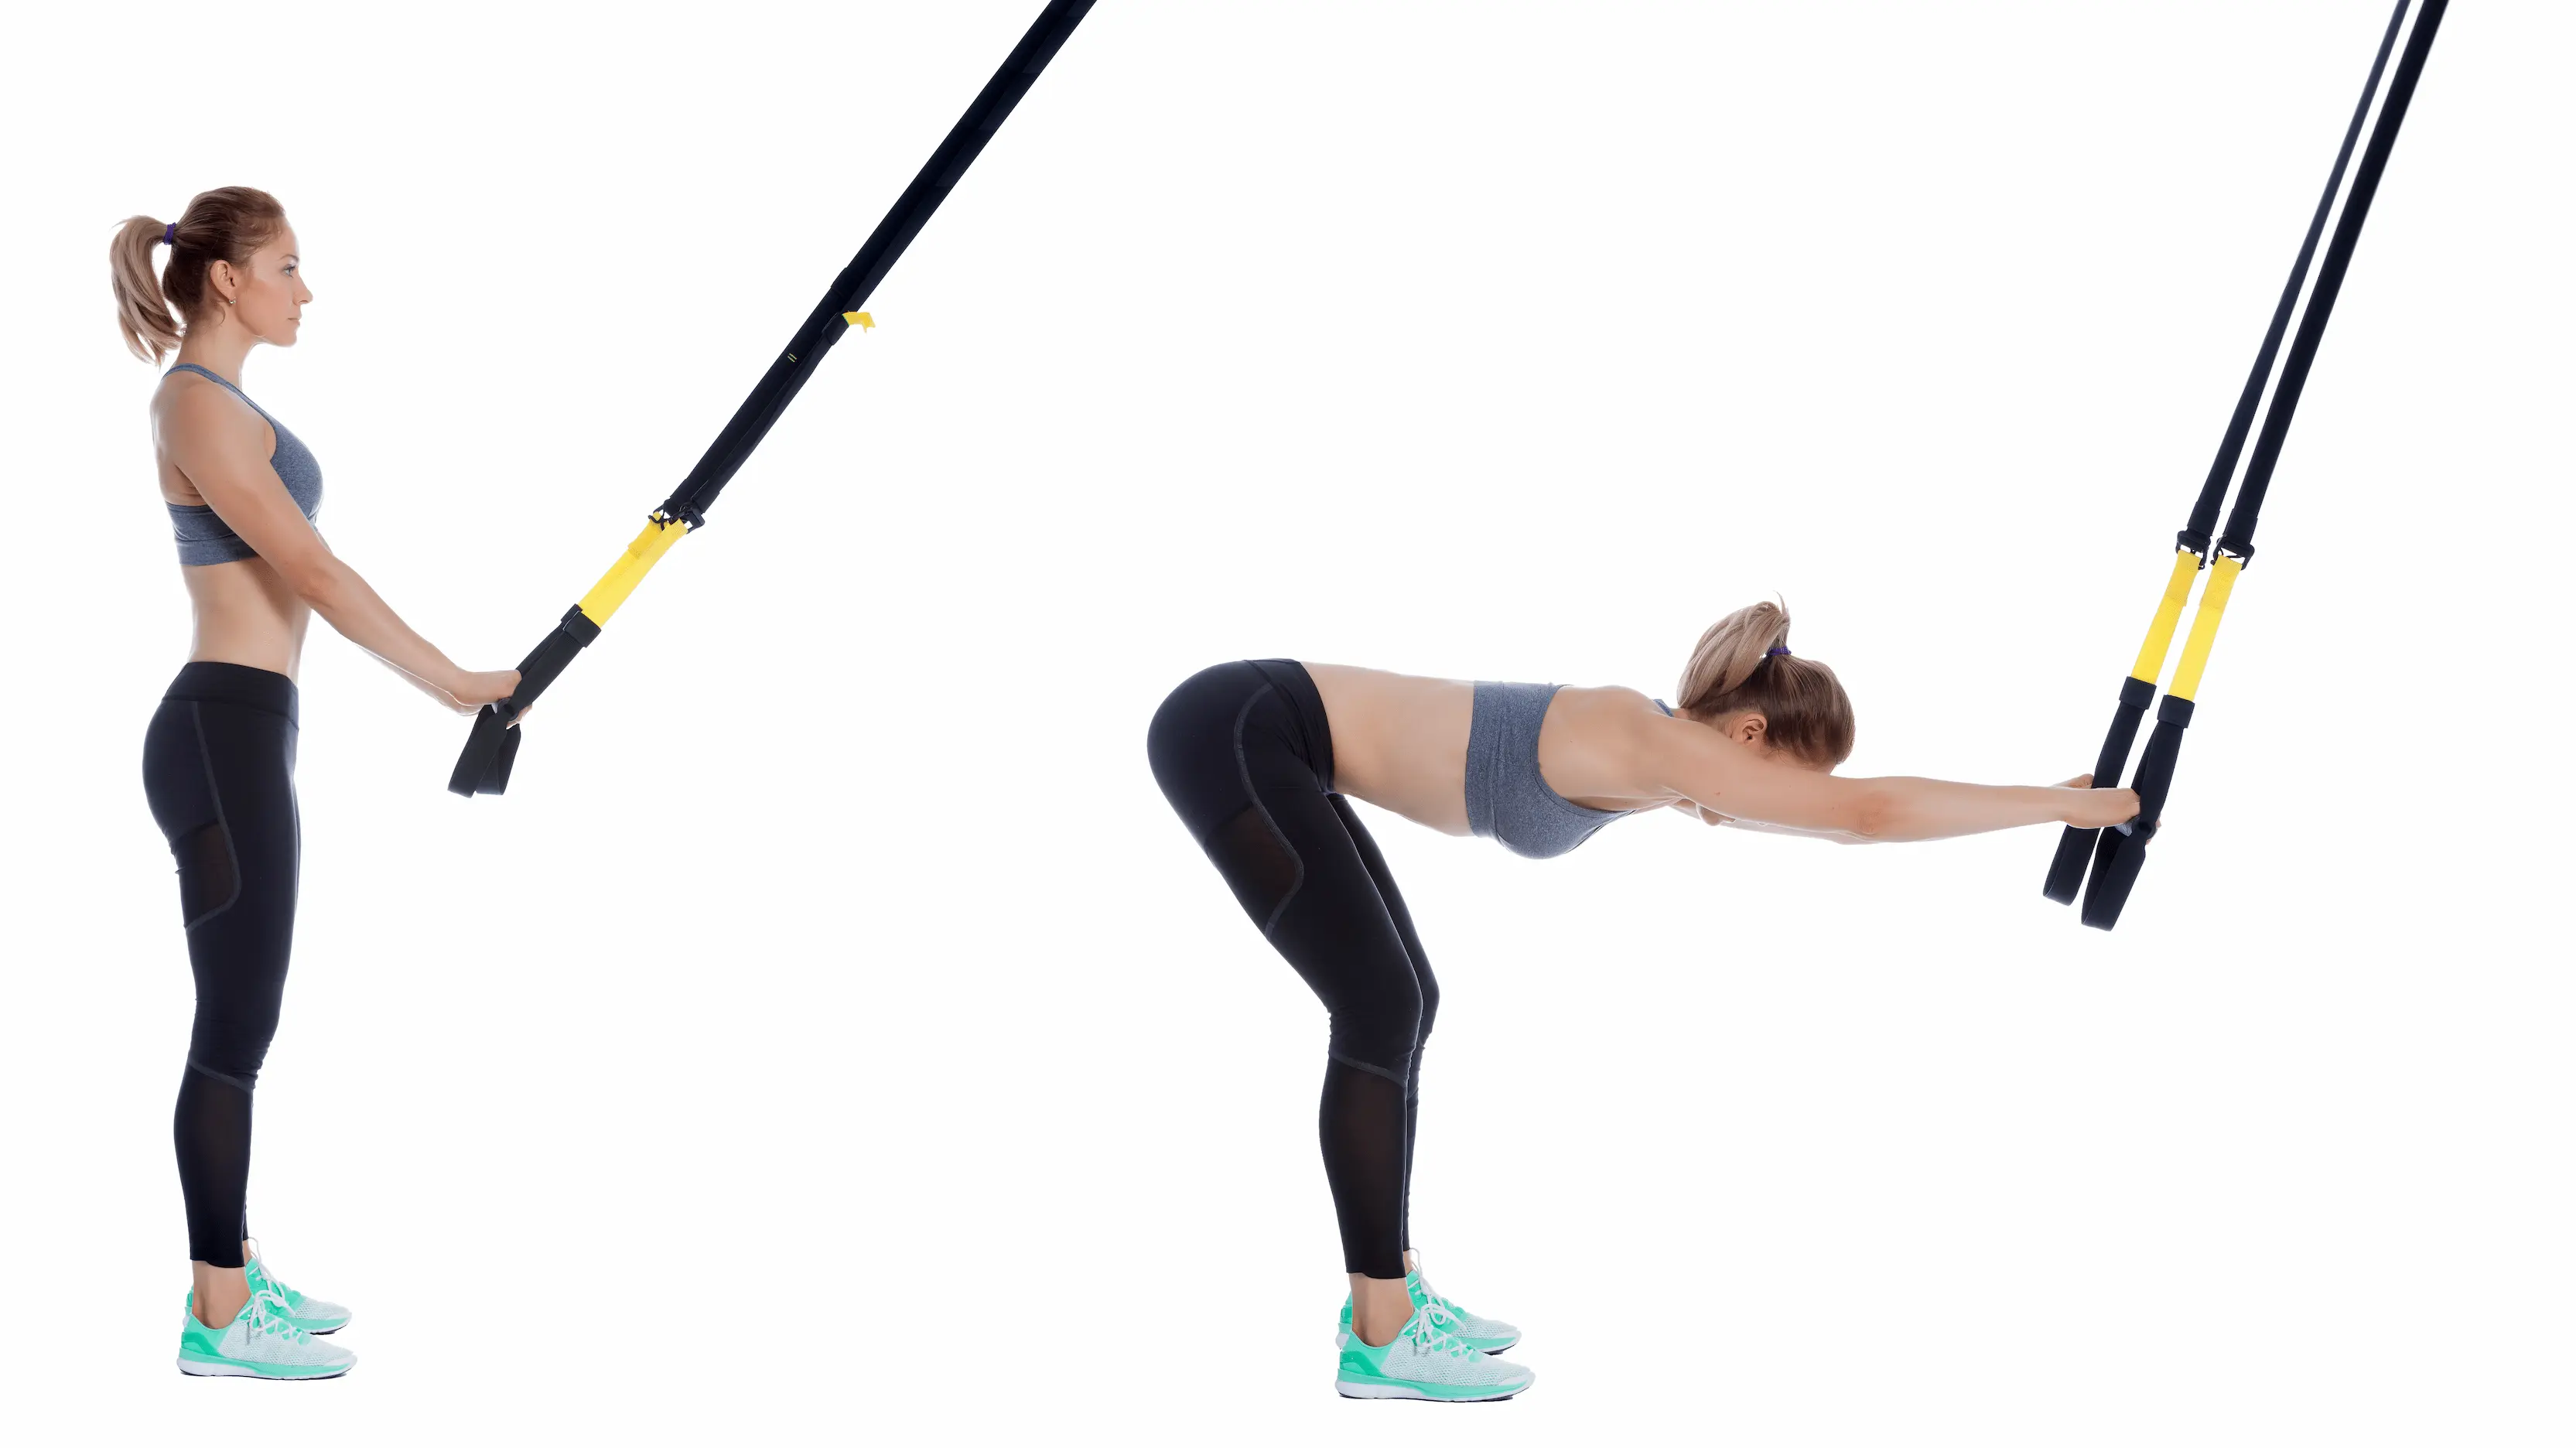
Reduced range of motion, elbows almost straight. Purpose: learn to “pull the shoulders toward the hips” (shoulder packing) to secure future TRX Pike / Push movements.
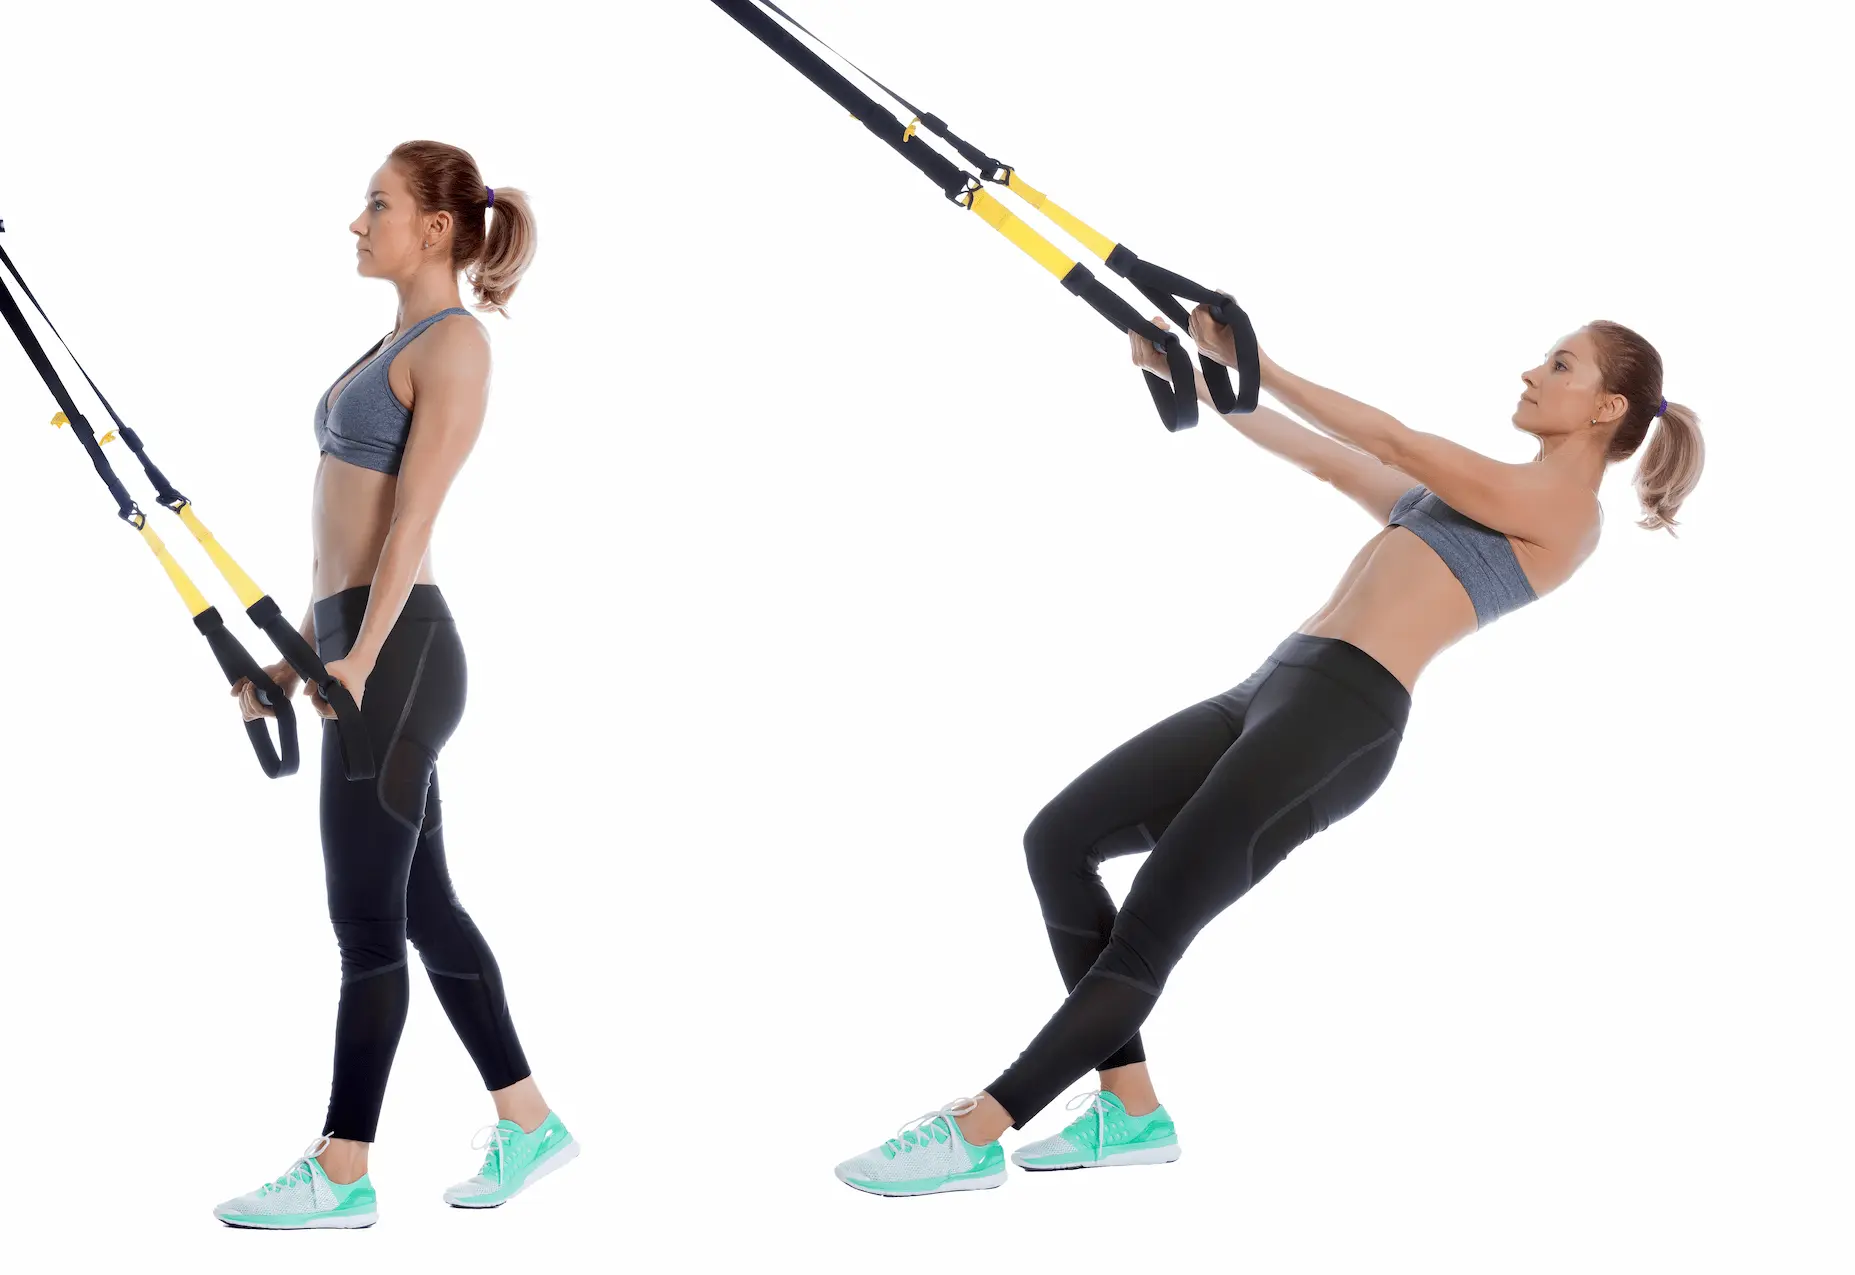
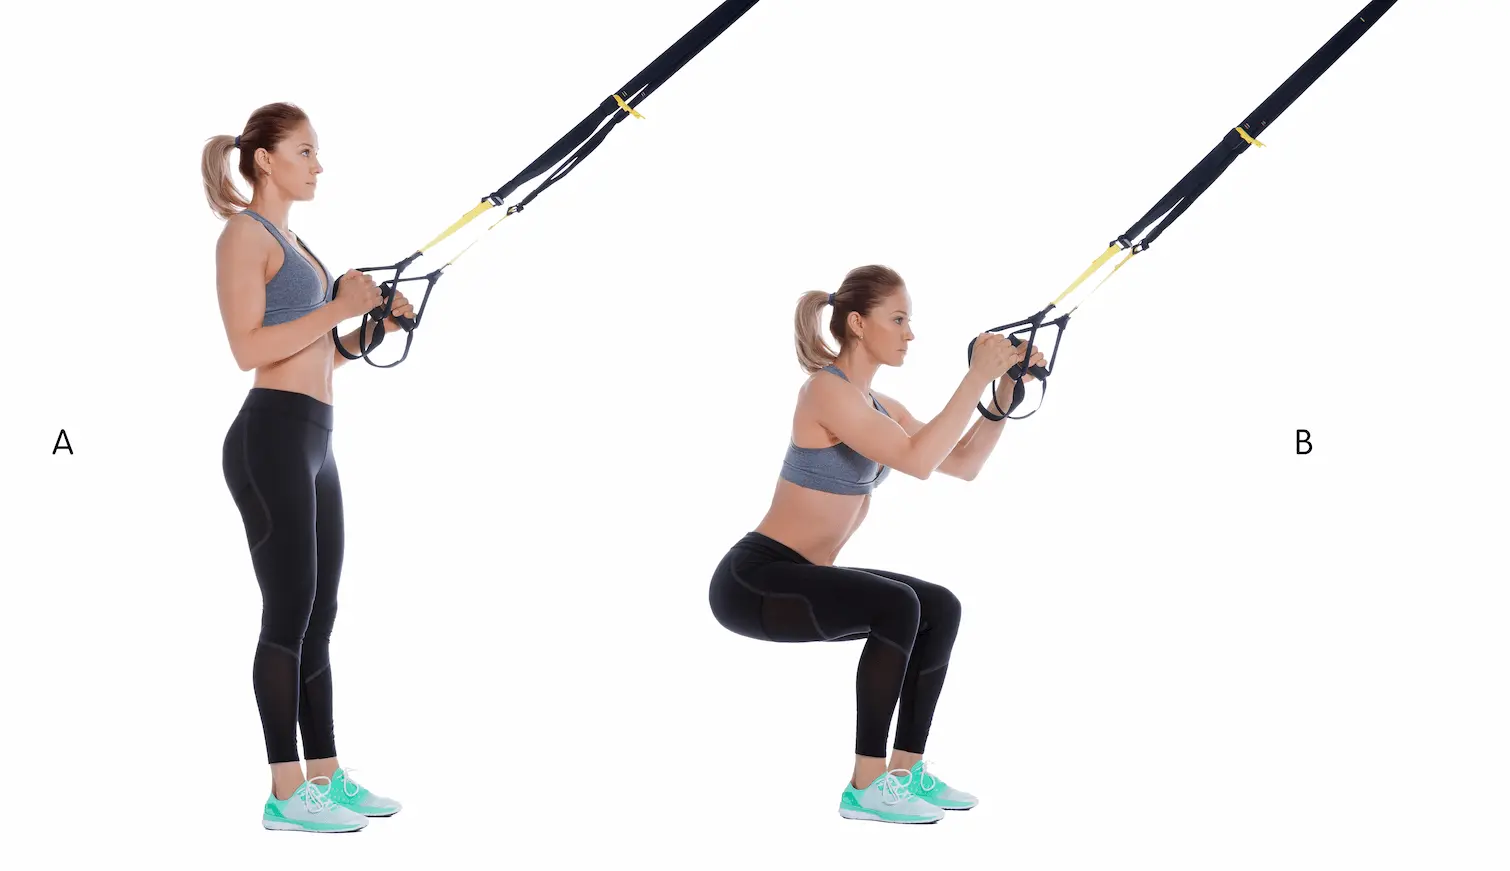
Assisted squat using the straps, with a moderate range of motion. Helps wake up the hips, knees, and global coordination without excessive muscular fatigue.
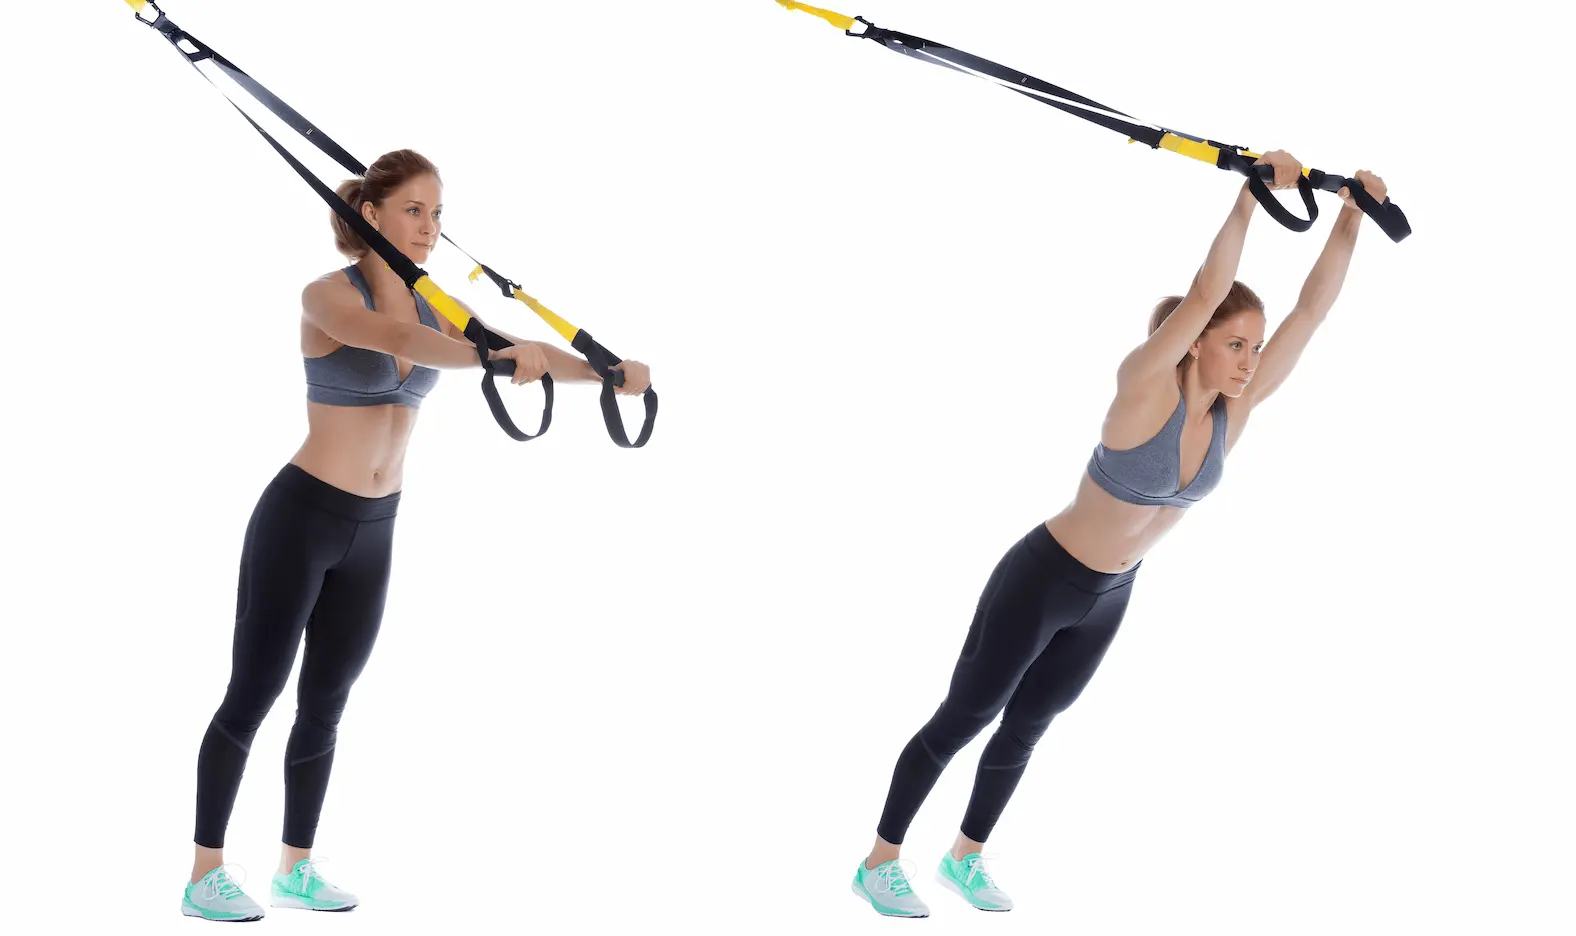
Arms extended, with a micro forward shift (5–10 cm). Prepares deep anti-extension work and core control for more demanding variations.
- Starting position:
Set up in a front plank, elbows under the shoulders, forearms parallel. Feet are placed in the suspension straps (TRX® style), body aligned from head to heels, transverse abdominis engaged, glutes active. - Creating tension:
Lock the ribs down toward the pelvis, move the shoulders slightly away from the ears, and drive the elbows into the floor. Feel the body form one solid unit, without lumbar arching. - Movement phase – “Saw”:
As you inhale, slide your body forward as one unit by pushing the elbows into the floor. Let the feet travel backward without breaking the shoulder–pelvis–heel line. Keep the range controlled: there is no need to go “far”. - Controlled return:
Exhale and slowly bring the body back to the neutral position, still as one unit. Do not let the hips rise into a pike or the lower back arch. - Target rhythm / range:
Work with a slow 2–1–2 tempo (forward – pause – return), using a moderate range of motion. Quality remains the priority: stop the set as soon as you lose lumbar neutrality or the shoulders start moving up toward the ears.
| ❌ Common faults | ✅ Best practices |
|---|---|
|
|
| Technical format Phase 2 – Neuro-Activation | Main core format Phase 5 – Core Block | |
|---|---|---|
| Purpose | Establish a clean dynamic bracing pattern before more intense blocks. | Strengthen anti-extension core endurance over a slightly longer duration. |
| Structure | 2–3 sets of 6–8 controlled forward–backward reps. | 3–4 sets of 10–15 movements or timed blocks (20–30 s). |
| Load / intensity | RPE 5–6 : full focus on alignment and breathing. | RPE 7–8 : clear local burn, but technique stays intact until the end of the set. |
| Intra-block rest | 60–90 s between sets to maintain precision. | 45–60 s, with the option to combine it with a TRX push-up or another core exercise. |
| Frequency | 1–2×/week as TRX pre-activation. | 1×/week in the main Core Block, over a 4–6 week cycle. |
| Key instruction | Stop the set as soon as lumbar neutrality is lost, even if the target rep count has not been reached. | Prioritise quality: a slightly lower volume with a locked core is better than high volume performed “through the lower back”. |
| Technical strength (alignment + control) | Muscular density (continuous tension) | Muscular endurance (core endurance) | |
|---|---|---|---|
| Sets | 3 | 4 | 3 |
| Repetitions / movements | 6–8 forward–backward reps | 8–12 movements | 15–20 movements |
| Tempo | 2–1–2 | 2–1–2 | 1–0–1 |
| Rest | 90 s | 60 s | 45 s |
| Purpose | Build a flawless bracing pattern. | Maintain continuous tension through the core with controlled range of motion. | Keep the movement clean until local fatigue, without lower-back pain. |
Phase 5 – Core Block
Integration logic
- In Phase 2, use the TRX® Body Saw as neuromotor pre-activation before a more intense core or HIIT block.
- In Phase 5, integrate it as the central exercise of the Core Block, either on its own or in a superset with TRX® push-ups or dynamic plank variations.
- Keep volume limited to short, high-quality blocks: as soon as lumbar neutrality is compromised, reduce the range of motion or return to a static plank.
Recommended frequency
- 1×/week as TRX pre-activation, plus a maximum of 1×/week as the main core block for advanced trainees.
- Plan 3–4 week cycles with a progressive increase in difficulty (range or duration), followed by a lighter week to allow the joints and lower back to recover.
The Neuro Phase is not a warm-up — it is the moment where you program the movement pattern.
HIIT tests your strength; Neuro builds your technique.
On the TRX® Body Saw, the goal is not to travel far, but to keep the core locked through every centimetre.
TRX® is a registered trademark of Fitness Anywhere LLC.