Wide-grip push-ups
Category : 🟧 Push – Chest / Shoulders / Triceps
Difficulty : ★★☆☆☆ (intermediate)
Equipment : None – bodyweight
Purpose
- Emphasise the work of the outer portion of the pectoralis major and the anterior shoulders, with strong support from the triceps at the end of the extension.
- Develop strength and control across the horizontal bodyweight pushing chain.
- Offer a more “chest-focused” variation than the close-grip push-up, while remaining fully usable with controlled tempo.
Muscles involved
- Primary: Pectoralis major (sternal / outer fibres), anterior deltoid.
- Synergists / stabilisers: Triceps brachii, especially at the end of the extension, serratus anterior, latissimus dorsi for scapular stabilisation, ribcage bracing and trunk muscles.
Variations
- Regression: wide-grip push-ups on the knees, while keeping the 90° elbow reference point and a solid body line.
- Incline: hands on a bench/step/box to reduce the perceived load, useful when returning to training or with heavier athletes.
- Decline: feet elevated to increase the load on the shoulders and upper chest.
- Combat sports variation: wide-grip push-ups on the fists, performed on a mat/tatami, to bring the movement closer to striking mechanics while protecting the wrists.
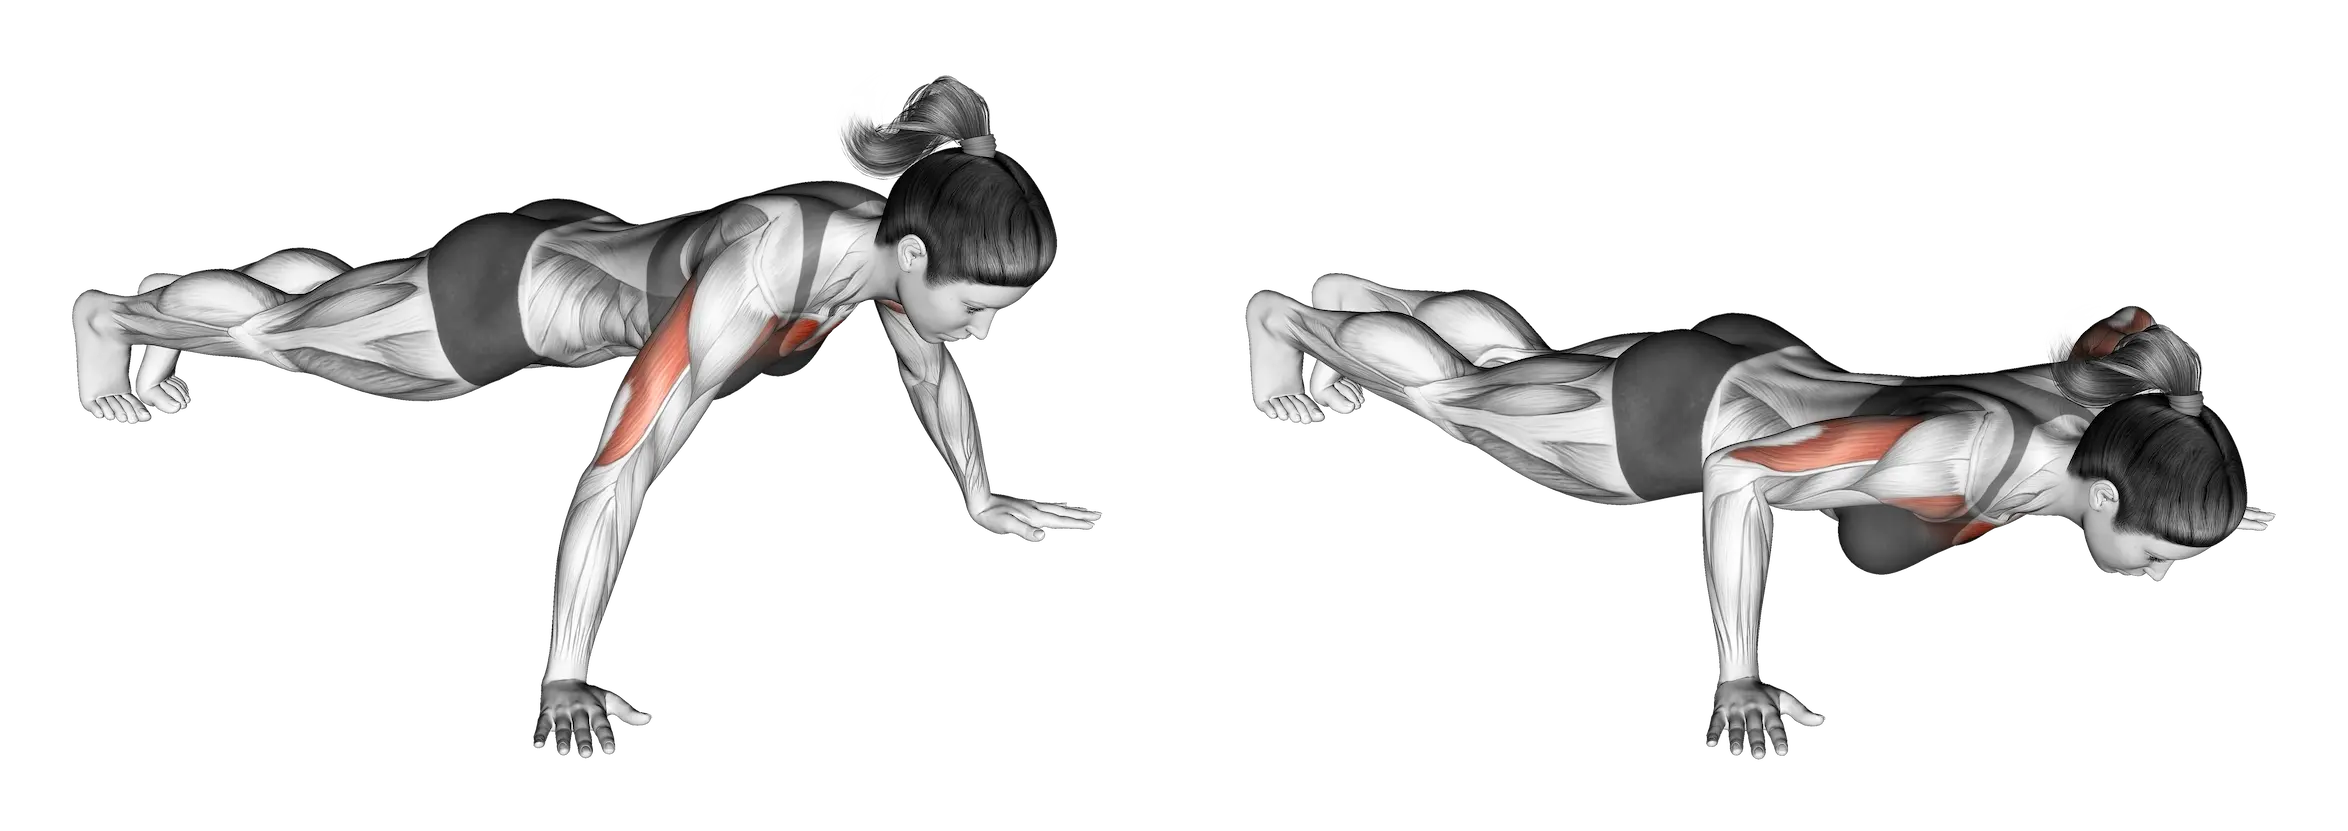
Controlled width, elbows under 60°, solid bracing: the foundation of a wide-grip push-up that stays effective over the long term.
Technique — step by step
- Starting position:
Place your hands wider than shoulder-width, so that in the bottom position your elbows can bend to around 90°. Fingers point forward or slightly outward, wrists positioned under the shoulder line. Keep the body in a plank position from head to heels, abs and glutes engaged, shoulders low. - Eccentric phase — lowering:
Bend the elbows and let them travel diagonally outward, without flaring them straight out to the sides. Aim for an arm-to-torso angle of around 45–60°. Bring the chest between the hands, or slightly in front of them, without arching the lower back. Inhale as you lower. - Concentric phase — pushing up:
Push the floor away while thinking about drawing the hands toward each other through horizontal adduction, rather than simply “going up”. Return to arm extension without aggressively locking the elbows. Exhale as you push up and keep the neck neutral. - Rhythm / target range of motion:
Use the simple reference point: “stop at 90° elbow bend”. Chest close to the hand line, then push back up. Base tempo: 2–0–2 (lowering–lifting), which can be extended during tempo blocks, for example 3–1–2.
| ❌ Common faults | ✅ Best practices |
|---|---|
|
|
1% Method
| Controlled tempo Mechanical stress without external load | |
|---|---|
| Purpose | Create high mechanical stress on the chest and shoulders by manipulating the duration of the lowering phase and the pause at the bottom, rather than relying on raw volume. |
| Structure | 3–4 sets of 4–12 reps depending on the goal, tempo 3–1–2, or even 4–1–2 during a control block. |
| Load | Bodyweight. Adjust difficulty through incline or decline positioning, with hands elevated or feet elevated, rather than sacrificing technique. |
| Intra-set rest | 60–90 s between sets, staying below the point where bracing and movement path start to degrade. |
| Frequency | 1–2×/week, alternating with standard-grip or close-grip push-ups. |
| Key cue | Prioritise tempo and form: elbows under 60°, stop at 90° elbow bend, no forced reps. |
Traditional programming
| Strength control (Tempo 3–1–2) | Hypertrophy (Tempo 3–1–2 or 4–1–2) | Mechanical endurance (Tempo 2–0–2 / 3–0–2) | |
|---|---|---|---|
| Sets | 3 | 3–4 | 2–3 |
| Repetitions | 4–6 | 8–12 | 12–20 |
| Tempo | 3–1–2 | 3–1–2 (or 4–1–2 during a control block) | 2–0–2 (or 3–0–2) |
| Rest | 90 s | 60–90 s | 45–60 s |
Integration within the “1% Method”
Phase 4 – Muscle Block
Integration logic
- Use it in a horizontal pushing block, in a chest or upper-body session, just after a heavy press such as barbell, dumbbell or machine press, or as the main exercise in a bodyweight session.
- A variation oriented toward the “outer chest”, alternating with the close-grip push-up to distribute load between the triceps and pectoralis major.
- In Phase 3 – HIIT (Cardio Peak 1), it can occasionally be used as a “control” exercise between two highly explosive efforts, such as jumps or sprints, provided the volume remains controlled.
- It also works well in a triplet: horizontal row → wide-grip push-up → scapular bracing exercise, such as Y-T-W or plank plus.
Recommended frequency
- 3–4 effective sets in Phase 4, or 1–2 short blocks when used in HIIT.
- 1–2 times per week, alternating between close-grip, standard-grip and incline/decline variations to distribute mechanical stress across the shoulder.
Coach’s note
Grip width changes the whole exercise: the farther the hands move away from the torso, the more tension shifts toward the outer chest and shoulders; the closer the hands move in, the more the push becomes axial and triceps-dominant. With a wide grip, the goal is not to copy marketing visuals with the arms stretched out like a cross: aim for a width that allows you to stay around 45–60° arm-to-torso, shoulders low, elbows never at 90° out to the sides.
Morphology changes the equation: with long arms, lowering the chest all the way to the floor in a wide grip can very quickly place a lot of stress on the front of the shoulder. Keep the simple rule that holds up in practice: stop at 90° elbow bend, even if that leaves a small “air gap”. Going lower does not necessarily produce more hypertrophy, but it clearly increases the joint cost.
Analysing humerus / forearm proportions will help you find a width and range of motion that are efficient for the athlete’s structure, instead of copying someone else’s technique.
Close grip → triceps first. Wide grip → chest and shoulders in the front line. In both cases: elbows under 60° and stop at 90° elbow bend.
Rep quality > ego: a clean 90° elbow range builds more muscle than crushing the chest down while putting the shoulder at risk.