TRX® Assisted Squat – Suspension Strap Assisted Squat
Category: 🟨 Lower Body (Squat / Lunges)
Difficulty: ★☆☆☆☆ (beginner/intermediate)
Equipment: Suspension straps (TRX®-style)
Goal
- Learn or correct the squat pattern with assistance, without axial loading.
- Improve ankle/hip mobility and squat depth safely.
- Build basic functional strength and trunk stability before progressing to free weights.
Muscles Worked
- Primary: Quadriceps, gluteus maximus, hamstrings (stabilization).
- Synergists / stabilizers: transverse abdominis, global core bracing, spinal erectors, gluteus medius (knee alignment), scapular muscles (light pulling assistance, shoulder stability).
Variations
- Regressions: quarter squat or reduced depth, heels slightly elevated on a wedge or weight plate.
- Isometric squat: hold the bottom position for 20–40 s to reinforce posture.
- Squat + calf raise: more emphasis on quadriceps and ankle control, always under control.
- Advanced variation: assisted single-leg squat (assisted pistol) once the bilateral pattern is solid.
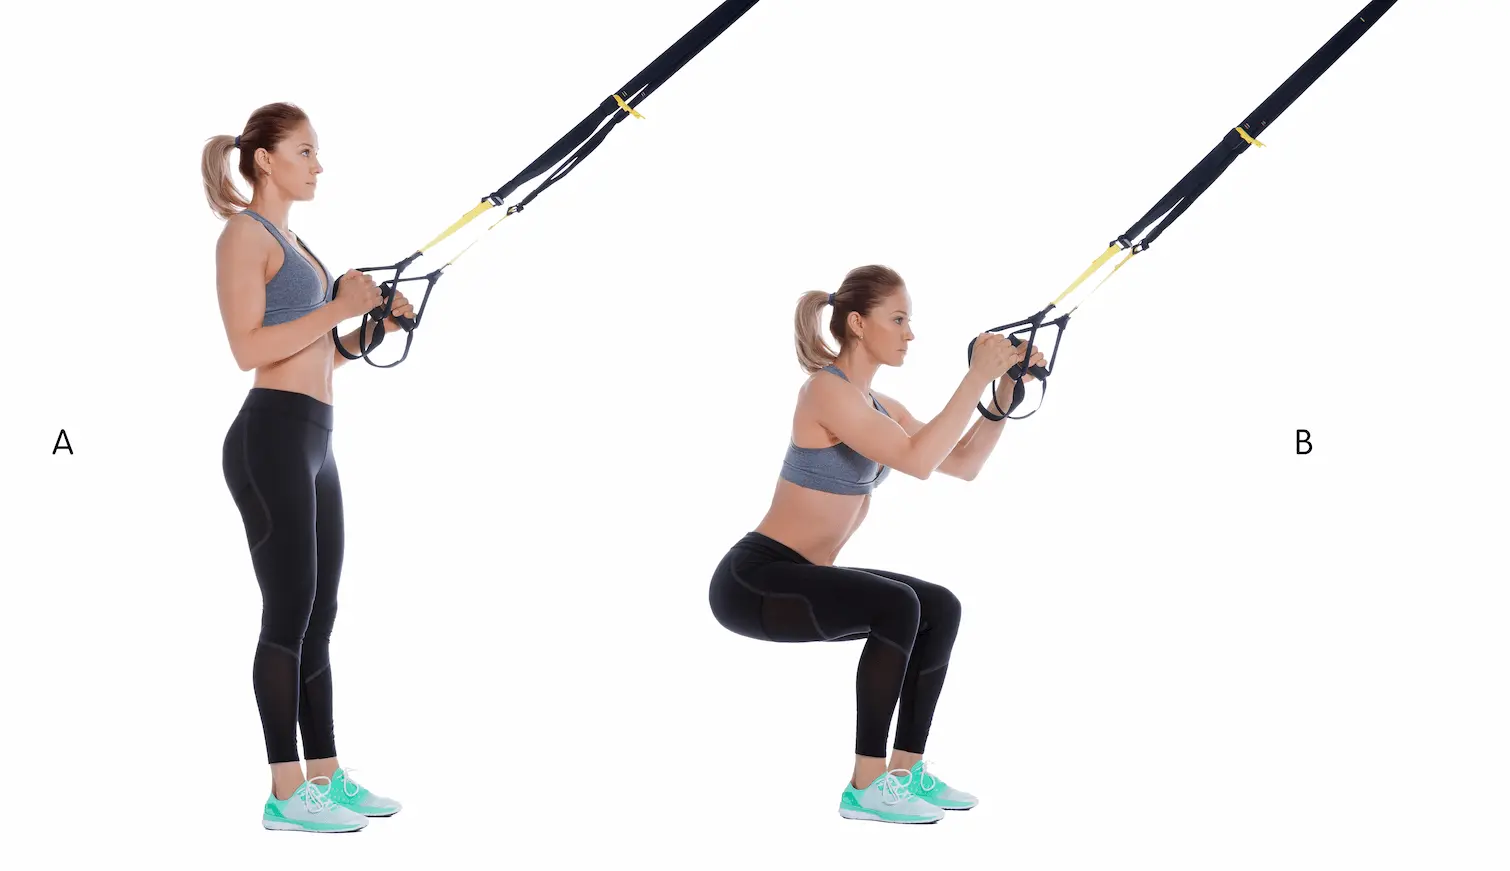
The TRX® Assisted Squat is not an “easy” version of the squat; it is a technical lab for learning how to squat properly.
TRX Setup & Key Points
- Strap length: handles at sternum height, straps slightly under tension in the standing position.
- Anchor point: around 2 m (door anchor, beam, standard ceiling), higher if possible (high beam, rig). During pulling movements, the straps should rise at roughly 30° from a horizontal line (parallel to the floor), with the incline adjusted through foot position. For this assisted squat, aim for well-tensioned straps set at roughly ~2.20–2.70 m high.
- Handle symmetry: handles set at exactly the same height, straps untwisted, equal length on both sides.
- Foot placement: feet shoulder-width apart, toes turned out 10–20°, full heel contact with the floor, pressure distributed across the whole foot.
Essential — Activation
This block is the core of the Suspension Training Warm-Up (2 minutes)
Complete this before Phase 2 (Neuro) and Phase 3 (HIIT).
Straps set at mid-calf height, long plank position, shoulders slightly in front of the wrists, transverse abdominis active. Micro Body Saw version = small forward/backward shift without losing body alignment.
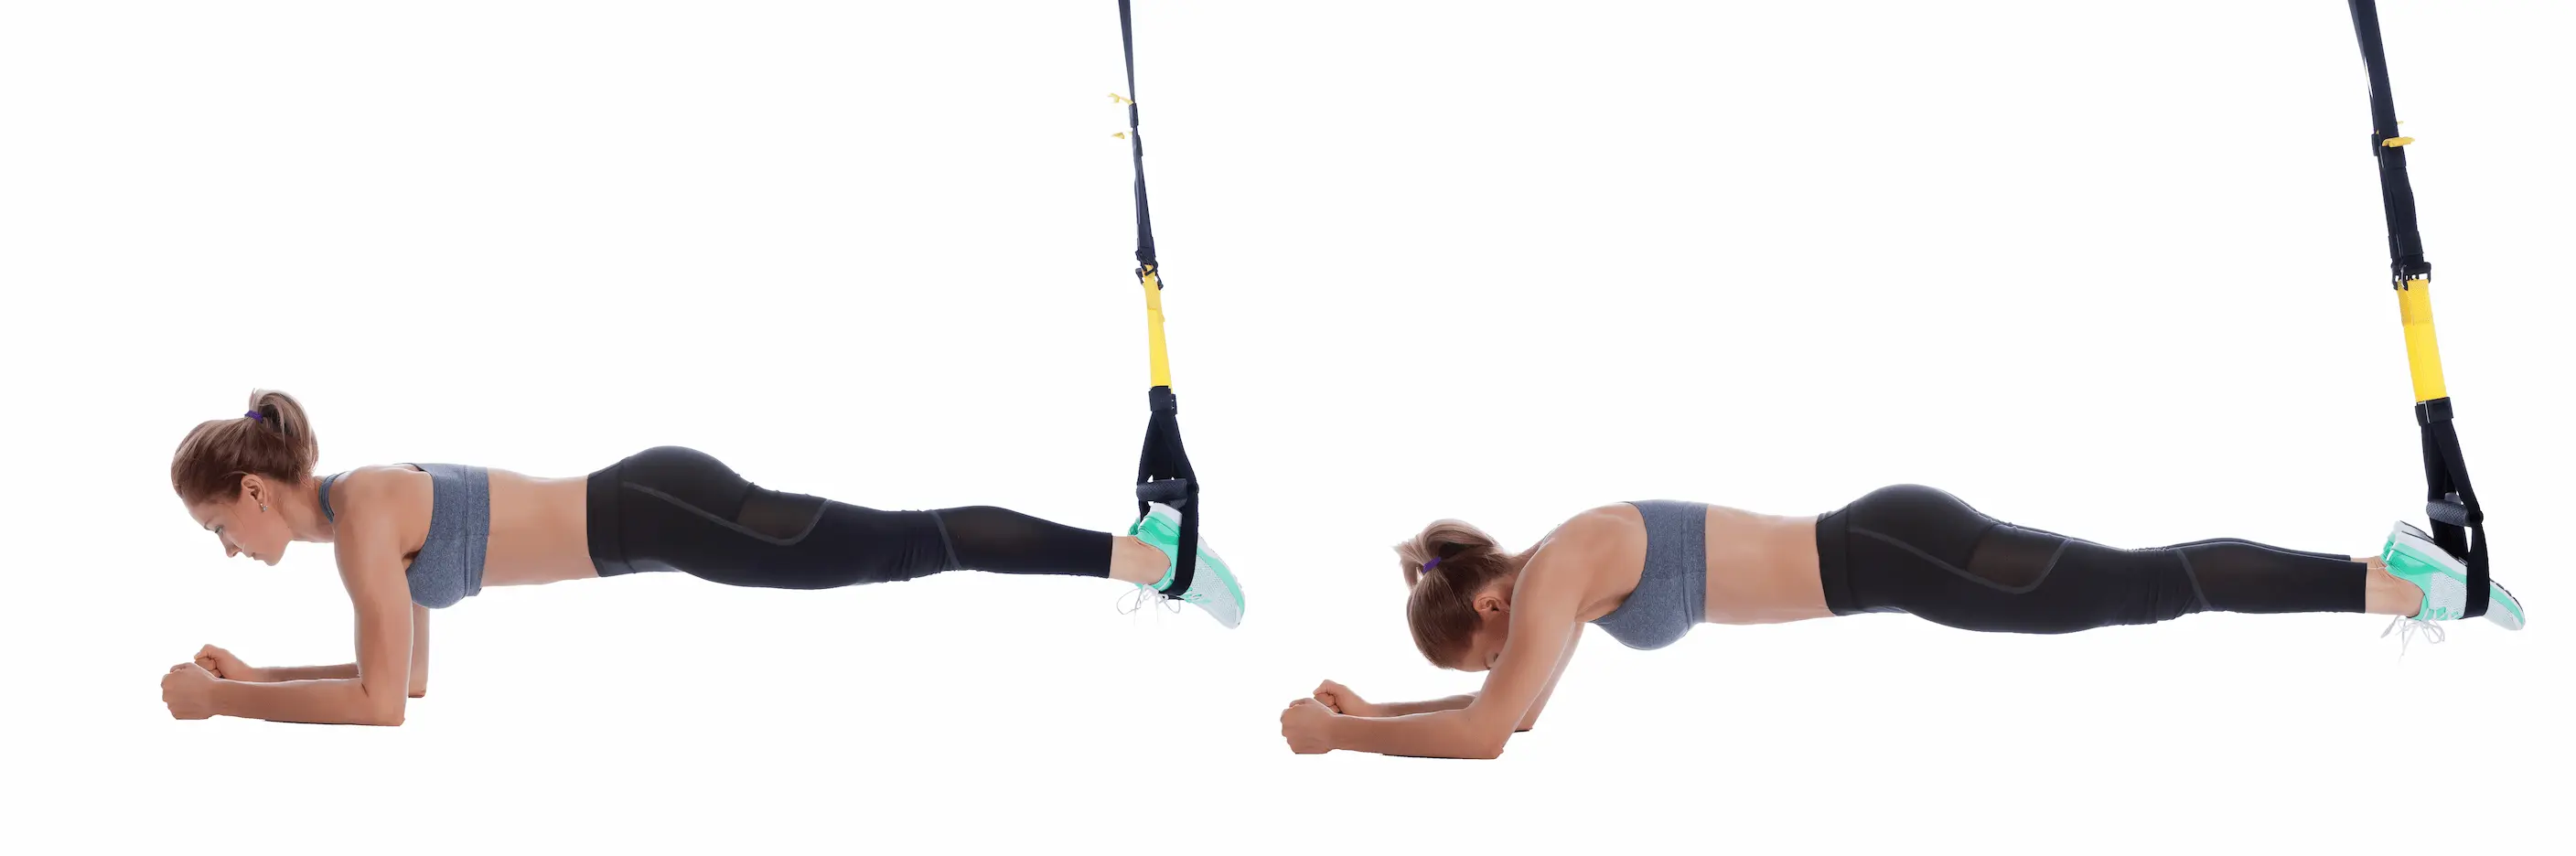
Arms straight, slight forward shift of the center of gravity. Focus on anti-extension control, without trying to reach maximum range of motion.
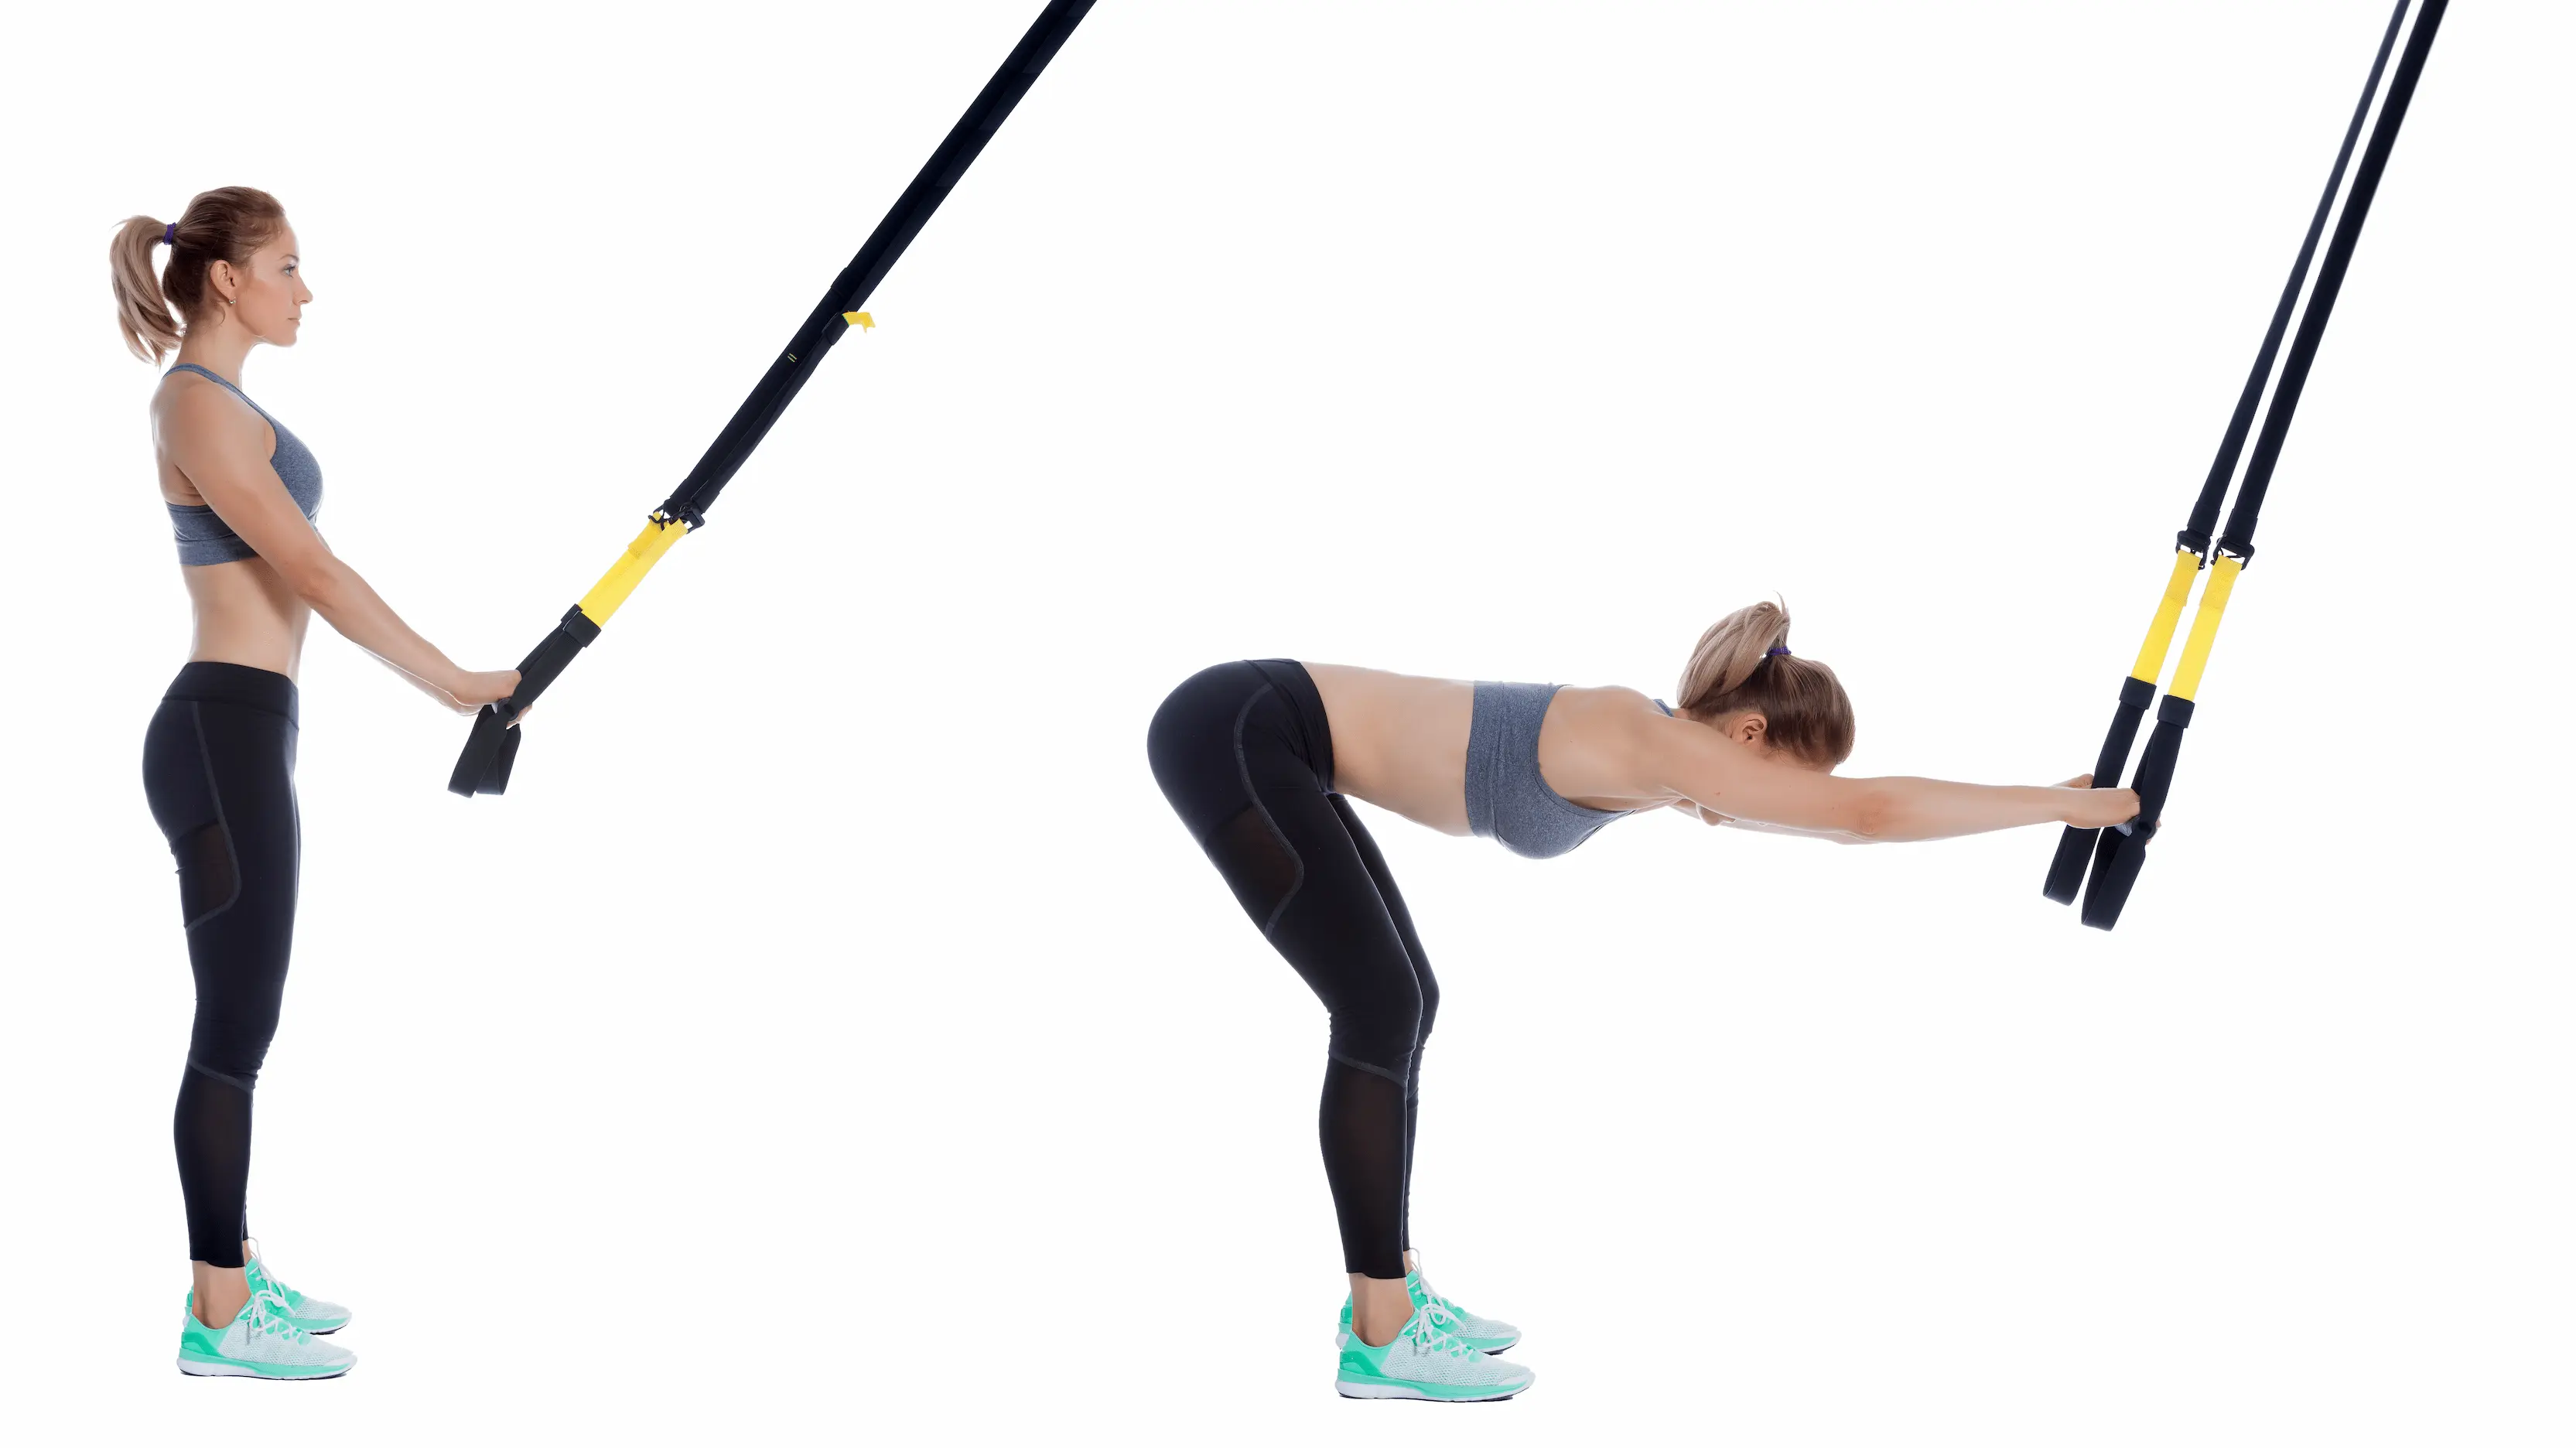
Reduced range of motion, elbows almost straight. Goal: learn to “pull the shoulders down toward the hips” (shoulder packing) to protect the shoulders before future TRX Pike / Push variations.
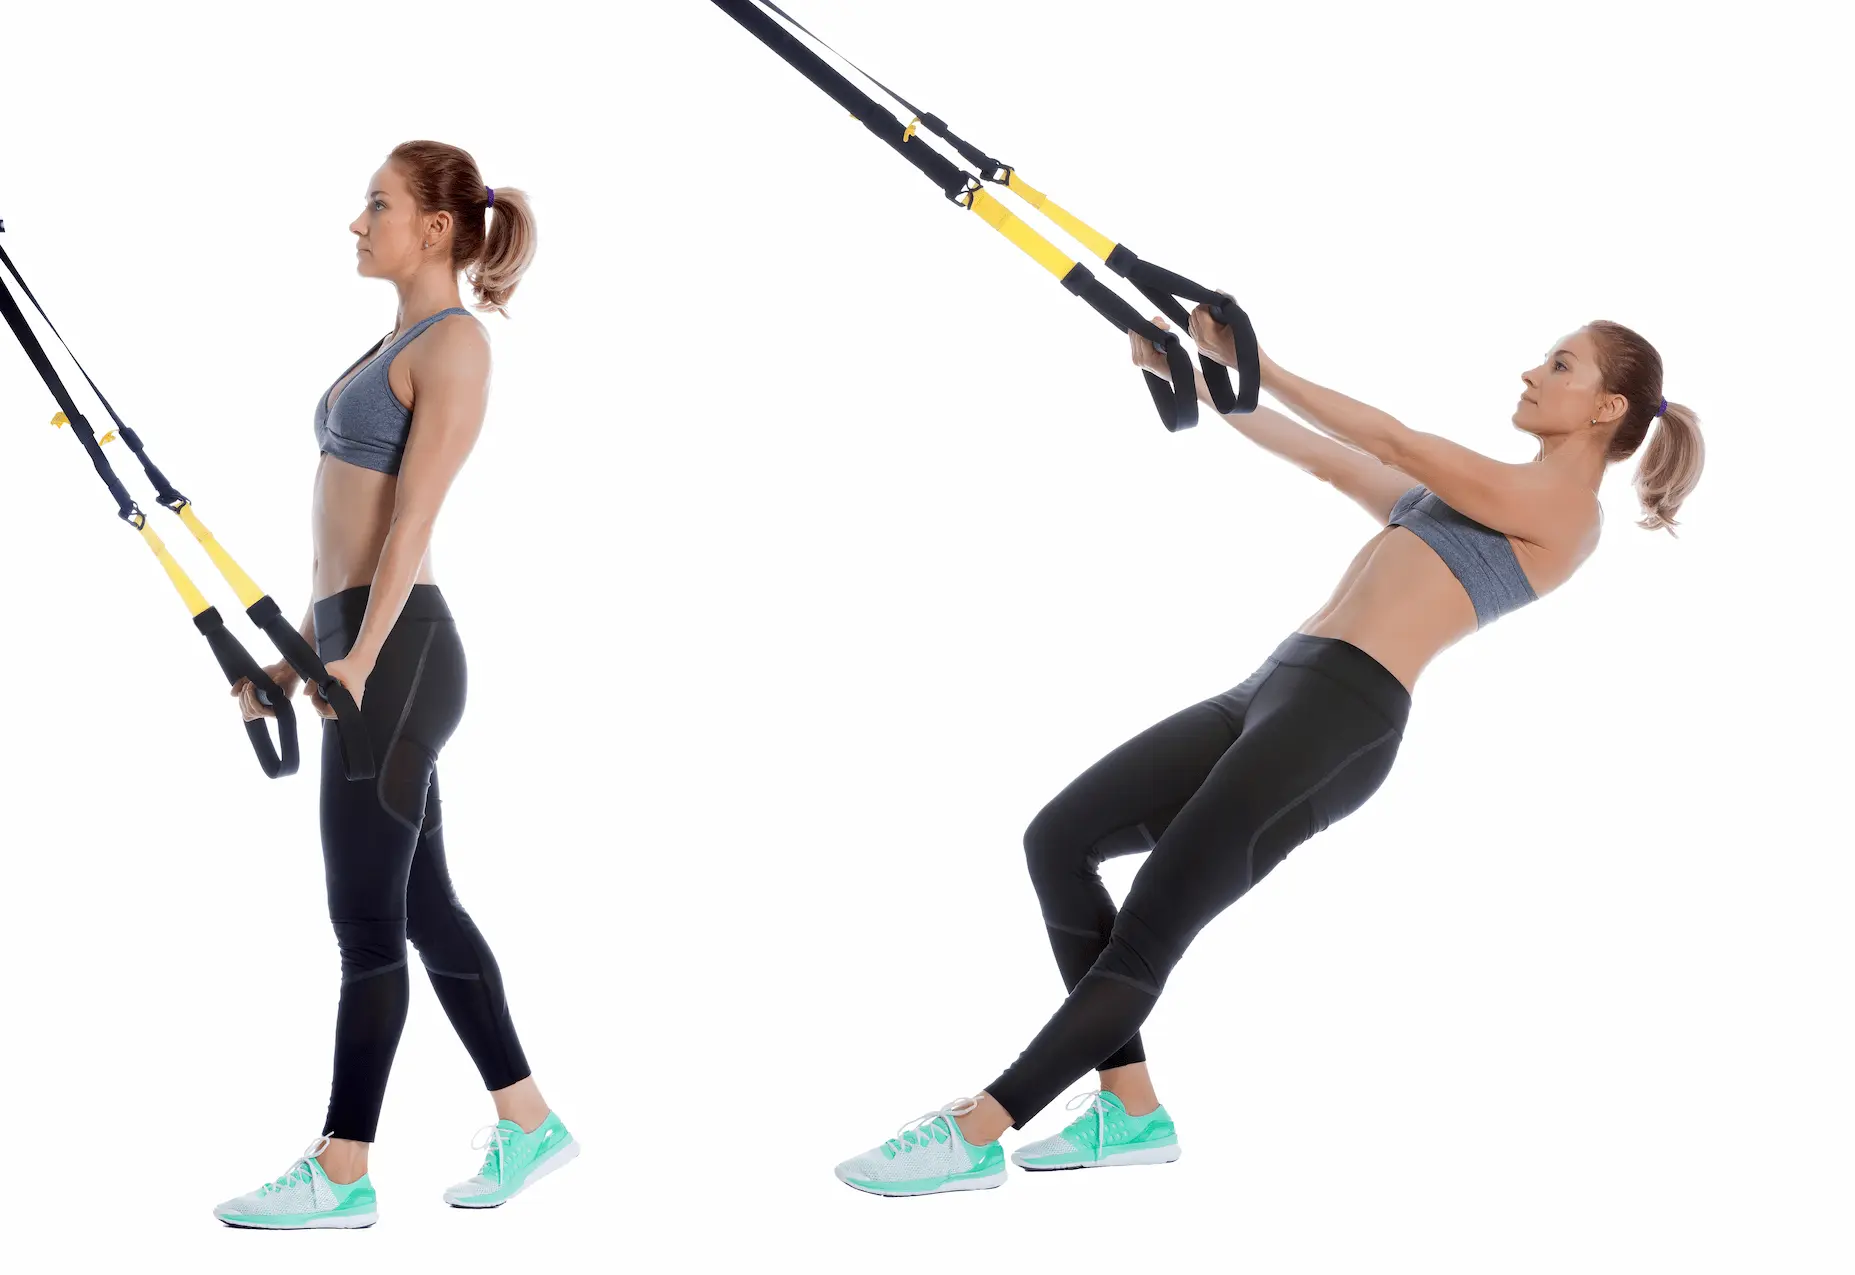
Assisted squat using the straps, with moderate range of motion. Helps activate the hips, knees, and global coordination without excessive muscular fatigue.
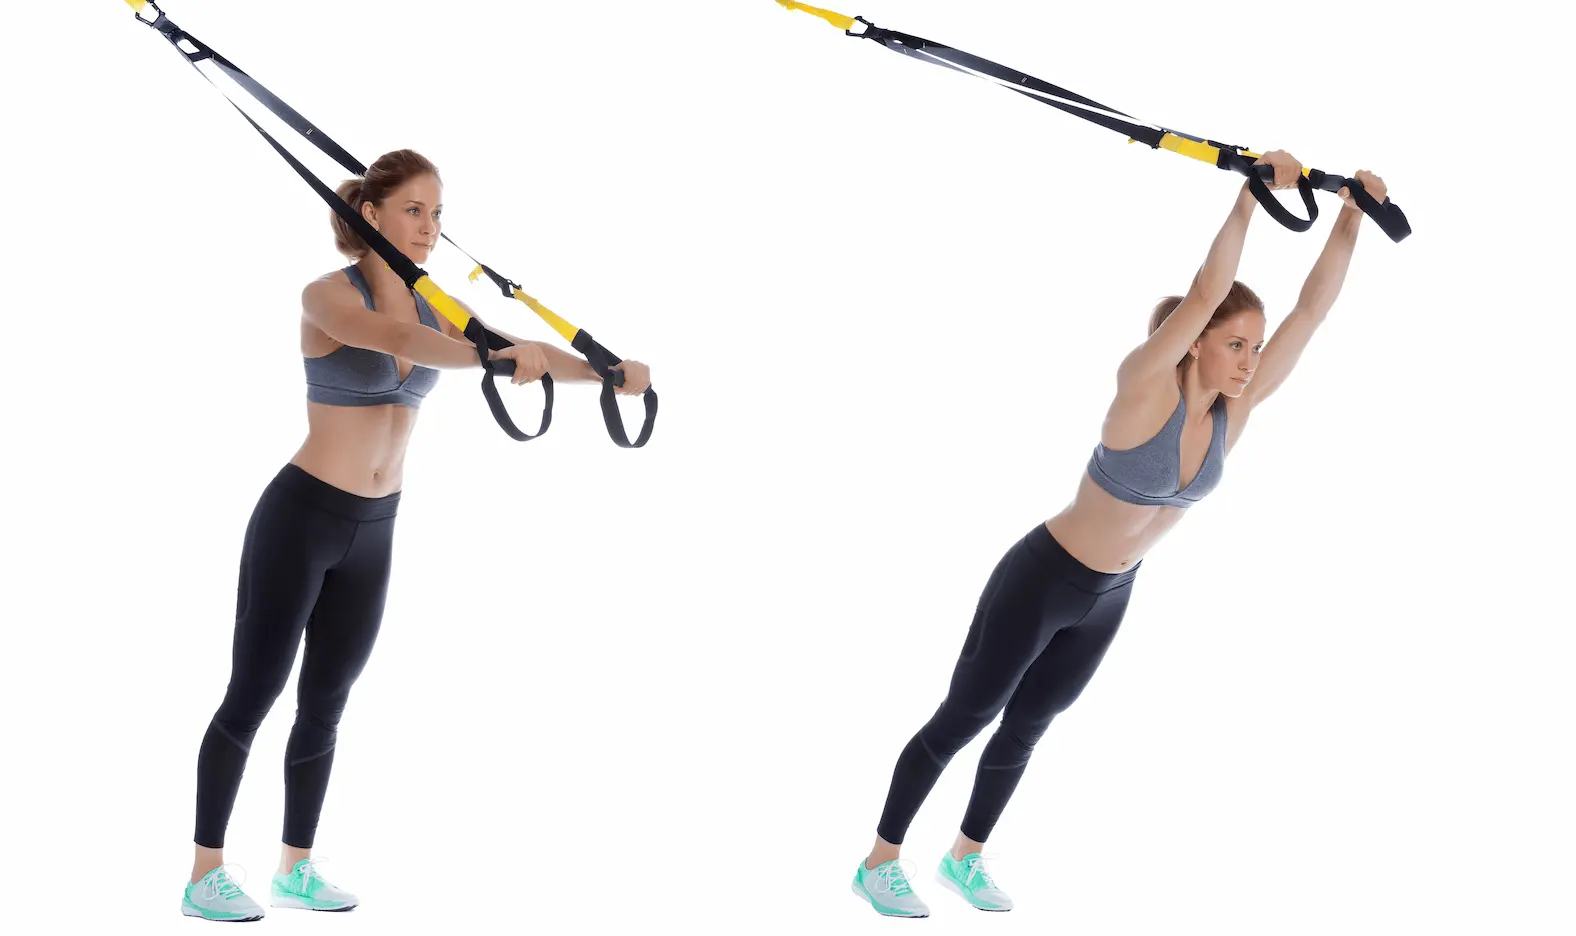
Arms straight, small forward shift (5–10 cm). Prepares deeper anti-extension work and trunk control for more demanding variations.
Technique — Step by Step
- Starting position:
Stand facing the anchor point, holding the suspension straps (TRX®-style) with bent arms and handles close to the chest. Feet shoulder-width apart, toes slightly turned out, heels firmly anchored. Core braced, chest open, eyes looking forward. - Movement phase – descent:
Inhale and “sit between your hips”: hips move back and down, knees track in line with the toes, heels stay on the floor. The straps remain lightly tensioned to guide balance, but you do not pull with the arms. - Bottom position:
Reach a comfortable, pain-free depth: thighs at least halfway down, neutral spine, knees aligned with the 2nd toe. Pause for 1–2 s if needed to reinforce posture and check stability. - Push phase – ascent:
Exhale as you push the floor away through the feet. Engage the glutes and quadriceps, rising while keeping the core braced and the chest open. The hands follow the movement but do not pull: they stabilize your center of mass. - Target tempo / range of motion:
Work with a 2–1–2 tempo (controlled descent – optional pause – smooth ascent), using the fullest range of motion possible without losing alignment or lifting the heels. Key cues: “Heels down”, “Knees track over toes”, “Chest open”, “Hold the straps, don’t pull them”.
Mistakes and Best Practices
| ❌ Common Mistakes | ✅ Best Practices |
|---|---|
|
|
“Method 1%” Integration
| Technical Neuro Format Phase 2 – Neuro-Activation | Technical Strength Format Phase 4 – Muscle Workout | |
|---|---|---|
| Goal | Build a clean, deep, stable squat pattern before adding load. | Strengthen functional lower-body strength without axial loading. |
| Structure | 2–3 sets of 8–10 controlled reps, with optional isometric pauses at the bottom. | 3–4 sets of 10–12 continuous or tempo-controlled reps, with full controlled range of motion. |
| Load / intensity | RPE 4–5 : focus on movement quality, not fatigue. | RPE 6–7 : meaningful effort, while keeping the movement pattern clean. |
| Intra-set rest | 45–60 s between sets to maintain neuromotor precision. | 60–75 s between sets, depending on level and the rest of the session. |
| Frequency | 1–2×/week in Block 2 while squat technique still needs to be consolidated. | 1×/week in a lower-body or quadriceps-dominant block. |
| Key instruction | Absolute priority on knee/ankle alignment and keeping the heels down; stop as soon as posture breaks down. | Use this format as an intermediate step before progressing to free squats or heavier loaded squat variations. |
Traditional Sessions
| Technical Strength (Clean pattern) | Muscle Density (Time under tension) | Muscular Endurance (Local resistance) | |
|---|---|---|---|
| Block | Phase 4 – Muscle Workout | Phase 4 – Muscle Workout | Phase 4 – Muscle Workout |
| Sets | 3 | 4 | 3 |
| Reps | 6–8 | 10–12 | 15–20 |
| Tempo | 3–1–2 | 2–1–2 | 2–0–2 |
| Rest | 60–90 s | 60 s | 45 s |
| Goal | Build a perfectly aligned assisted squat, with priority on control and depth. | Increase time under tension and quadriceps/glute stimulus without sacrificing technique. | Improve local leg endurance using a stable, repeatable squat pattern. |
Phase(s)
Phase 4 – Muscle Workout
Integration Logic
- Use the TRX® Assisted Squat in Block 2 – Neuro to build a solid squat pattern before introducing load or plyometrics.
- In Block 4 – Muscle Workout, integrate it as a technical strength exercise in a superset with a more loaded movement, such as a goblet squat, split squat, or leg press.
- Use it as a bridge between beginners and free-weight/barbell squats: once the technique is mastered, progress gradually toward less assisted variations.
Recommended Frequency
- 1–2×/week depending on the client’s level and technical needs, with priority during squat-learning cycles.
- Plan 3–4 high-quality sets, stopping the set as soon as the heels lift, the back rounds, or the knees lose alignment.
The TRX® Assisted Squat is your technical workshop: this is where you build a stable squat pattern you will later be able to load.
TRX® is a registered trademark of Fitness Anywhere LLC.